A Complete Guide to HTMX + .NET Minimal APIs
Table of Contents
Introduction
Note
This post has been updated for .NET 9.
With the release of .NET 8, you can now return a RazorComponentResult<T> from minimal api’s which
means that blazor components and pages can be returned easily from an endpoint. All dependencies will be injected in the blazor component/service,
albeit the rending model they operate under will always be completely static (unless you opt-in to Blazor Web via its bootstrapping script,
which is not what I’m going to do). Additionally, .NET 8 brought in some automatic binding features for minimal api so we can easily post forms and files to them.
There is a growing tech chatter over a tiny library with a big heart (and a surprisingly large following on X ) called HTMX (formerly intercooler.js). HTMX is a really simple library that leverages the tools given to us since the very beginning of the web to create fast and interactive websites. Taken from its own website:
htmx gives you access to AJAX, CSS Transitions, WebSockets and Server Sent Events directly in HTML, using attributes, so you can build modern user interfaces with the simplicity and power of hypertext.
HTMX may surprise traditional web developers for its “rule”-bending motivations:
- Why should only
<a>&<form>be able to make HTTP requests? - Why should only click & submit events trigger them?
- Why should only GET & POST methods be available?
- Why should you only be able to replace the entire screen?
By-and-large, HTMX (and hypermedia, of course) embrace the concept of HATEOAS, Hypertext As The Engine Of Application State. What this means is that there is no server or client maintaining state; no huge javascript/WASM payload as an “application” and no persistent websocket connection.
For more of the “why hypermedia was built for this all along” you can read the collection of essays or even their free book: Hypermedia Systems.
I know my bias against these toolchains is coming out and I sound slightly like a crazy person for touting technologies in a old-is-new again fashion but my angle here is that those tools are really great for extremely high interactive applications. There are a ton of use cases for using them (like stock trader apps) and when you need a high interactivity you should consider using them.
However, there are a ton of use cases for CRUD apps and tons of use cases for CRUD + islands of interactivity apps (the term islands of interactivity meaning static content with portions that are interactive). And that’s where HTMX really shines - dissolving complexity and returning to the roots of www.
Lets first cover why we’re not going to use Blazor Web (SSR/WASM/Server) and use HTMX as a drop-in replacement.
No Blazor Web
Blazor Web is great but there’s quite a few things that I find myself reaching for that HTMX brings out-of-the-box. Here is a small comparison, using HTMX/Minimal API’s and Blazor Server Side Rendering (SSR), curated for things that I tend to care about and tools I find myself needing:
htmx.jsis only ~14KB.blazor.web.jsis ~200kb.- Loading content dynamically based on viewport (intersect, scrolling into view, etc.) is not supported. Only stream rendering is supported (serving the page and then only once performing some asynchronous work).
- Loading content dynamically based on a trigger (load, something is clicked, something is clicked again, throttling, queueing, polling, etc.). Not supported.
- Loading content dynamically somewhere on the page based on something that happened somewhere else on the page. Not supported.
- Changing pages in Blazor SSR doesn’t bring you to the top of the page if both pages have below-the-fold content and you have scrolled down.
- Dynamically loading javascript scripts is janky and leave behind code when they’re swapped out.
- Managing render modes in Blazor is really complicated. It’s powerful but nonetheless complicated. Websockets, render modes, caching, etc..
- To get a little more subjective, submitting forms in Blazor SSR is janky 🤷♂️.
- I also like vertically slicing features and combining Blazor WASM + Server interactivity forces you into a
.Clientproject with just the interactive components and forces components to be separated.
Tip
HTMX has a lot of different ways to respond to events which you can read about here.
Creating The Project
Note
Want to just see the code? Click here!
Let us start fresh with a brand new dotnet minimal api and the end goal is going to be to recreate the Blazor sample template with HTMX with a lot of extras to make this a complete guide.
dotnet new webapi --output HtmxMinimalApi --no-openapi
No OpenApi support? Yes that’s fine! The API endpoints are going to return HTML and versioning constantly is the point. This is really no different than a server-side rendered application like ASP.NET MVC - the theme has been and is going to continue to be that we are travelling back in time with modern technology.
Additionally, for now I am going to throw out all the weather forecast api boilerplate. It will come back in a modified form later. Below is my entire Program.cs.
// Program.cs
var builder = WebApplication.CreateBuilder(args);

builder.Services.AddRazorComponents(); // We need to add razor component services so things actually render.

var app = builder.Build();

app.UseHttpsRedirection();
app.MapStaticAssets(); // We need to add static files so they show up. Note that some of the benefits of .MapStaticAssets() do not work (yet) in Minimal APIs.

app.Run();
Adding A Layout & Navbar
Did I forget to mention I really like the Blazor component developer experience? Because I do. I am going to add a layout, which all of the real pages are going to return and the navbar. Just like a Blazor Web application we are still going to differentiate between pages and components because we will have API endpoints that return both.
Since the goal is to recreate the sample pages, I am just going to pull these straight from a dotnet new blazor project with a couple tweaks.
You can place these anywhere in the project directory. I am opting for a vertical slice type of folder layout.
<!-- Features/Shared/HtmxLayout.razor
     The sample's App.razor and MainLayout.razor files combined together. Don't forget the MainLayout.razor.css file! -->
@inherits LayoutComponentBase

<!DOCTYPE html>
<html class="h-100" lang="en-us">
    <head>
        <meta charset="utf-8"/>
        <meta name="viewport" content="width=device-width, initial-scale=1.0"/>
        <base href="/"/>
        <link rel="stylesheet" href="@Assets["bootstrap/bootstrap.min.css"]"/>
        <link rel="stylesheet" href="@Assets["app.css"]"/>
        <link href="HtmxMinimalApi.styles.css" rel="stylesheet">
        <script src="https://unpkg.com/htmx.org@2.0.4"></script> <!-- This is the only thing I have added. HTMX! -->
        <HeadOutlet/>
    </head>
    <body>
        <div class="page">
            <div class="sidebar">
                <NavMenu/>
            </div>

            <main>
                <div class="top-row px-4">
                    <a href="https://learn.microsoft.com/aspnet/core/" target="_blank">About</a>
                </div>

                <article class="content px-4">
                    @Body
                </article>
            </main>
        </div>

        <!-- I removed the exception notification - that is covered elsewhere. -->
    </body>
</html>
<!-- Features/Shared/NavMenu.razor
     Don't forget the NavMenu.razor.css file! -->
<div class="top-row ps-3 navbar navbar-dark">
    <div class="container-fluid">
        <a class="navbar-brand" href="">HtmxMinimalApi</a>
    </div>
</div>

<input type="checkbox" title="Navigation menu" class="navbar-toggler"/>

<div class="nav-scrollable" onclick="document.querySelector('.navbar-toggler').click()">
    <nav class="flex-column">
        <div class="nav-item px-3">
            <NavLink class="nav-link" href="">
                <span class="bi bi-house-door-fill-nav-menu" aria-hidden="true"></span> Home
            </NavLink>
        </div>

        <div class="nav-item px-3">
            <NavLink class="nav-link" href="counter">
                <span class="bi bi-plus-square-fill-nav-menu" aria-hidden="true"></span> Counter
            </NavLink>
        </div>

        <div class="nav-item px-3">
            <NavLink class="nav-link" href="weather">
                <span class="bi bi-list-nested-nav-menu" aria-hidden="true"></span> Weather
            </NavLink>
        </div>
    </nav>
</div>
<!-- Features/_Imports.razor -->
@using System.Net.Http
@using System.Net.Http.Json
@using Microsoft.AspNetCore.Components.Forms
@using Microsoft.AspNetCore.Components.Routing
@using Microsoft.AspNetCore.Components.Web
@using HtmxMinimalApi.Features.Shared <!-- (Optional) Easily use the shared components in all razor files. -->
The First Page - Home
This is going to be a pattern but I am going to pull the home page from the sample template because we want it to look exactly the same.
Except we are also going to include the HtmxLayout as the layout for this page.
@layout HtmxLayout
<!-- Features/Home.razor -->
<PageTitle>Home</PageTitle>

<h1>Hello, world!</h1>

Welcome to your new app.
Now this is where the magic starts happening. Like I mentioned in the introduction, I am going to use RenderComponentResult<T> to actually return the home page
from the minimal api. Here is the new Program.cs.
// Program.cs
var builder = WebApplication.CreateBuilder(args);

builder.Services.AddRazorComponents();

var app = builder.Build();

app.UseHttpsRedirection();
app.UseStaticFiles();

app.MapGet("/", () => new RazorComponentResult<Home>()); // New endpoint.

app.Run();
Ta-da!!
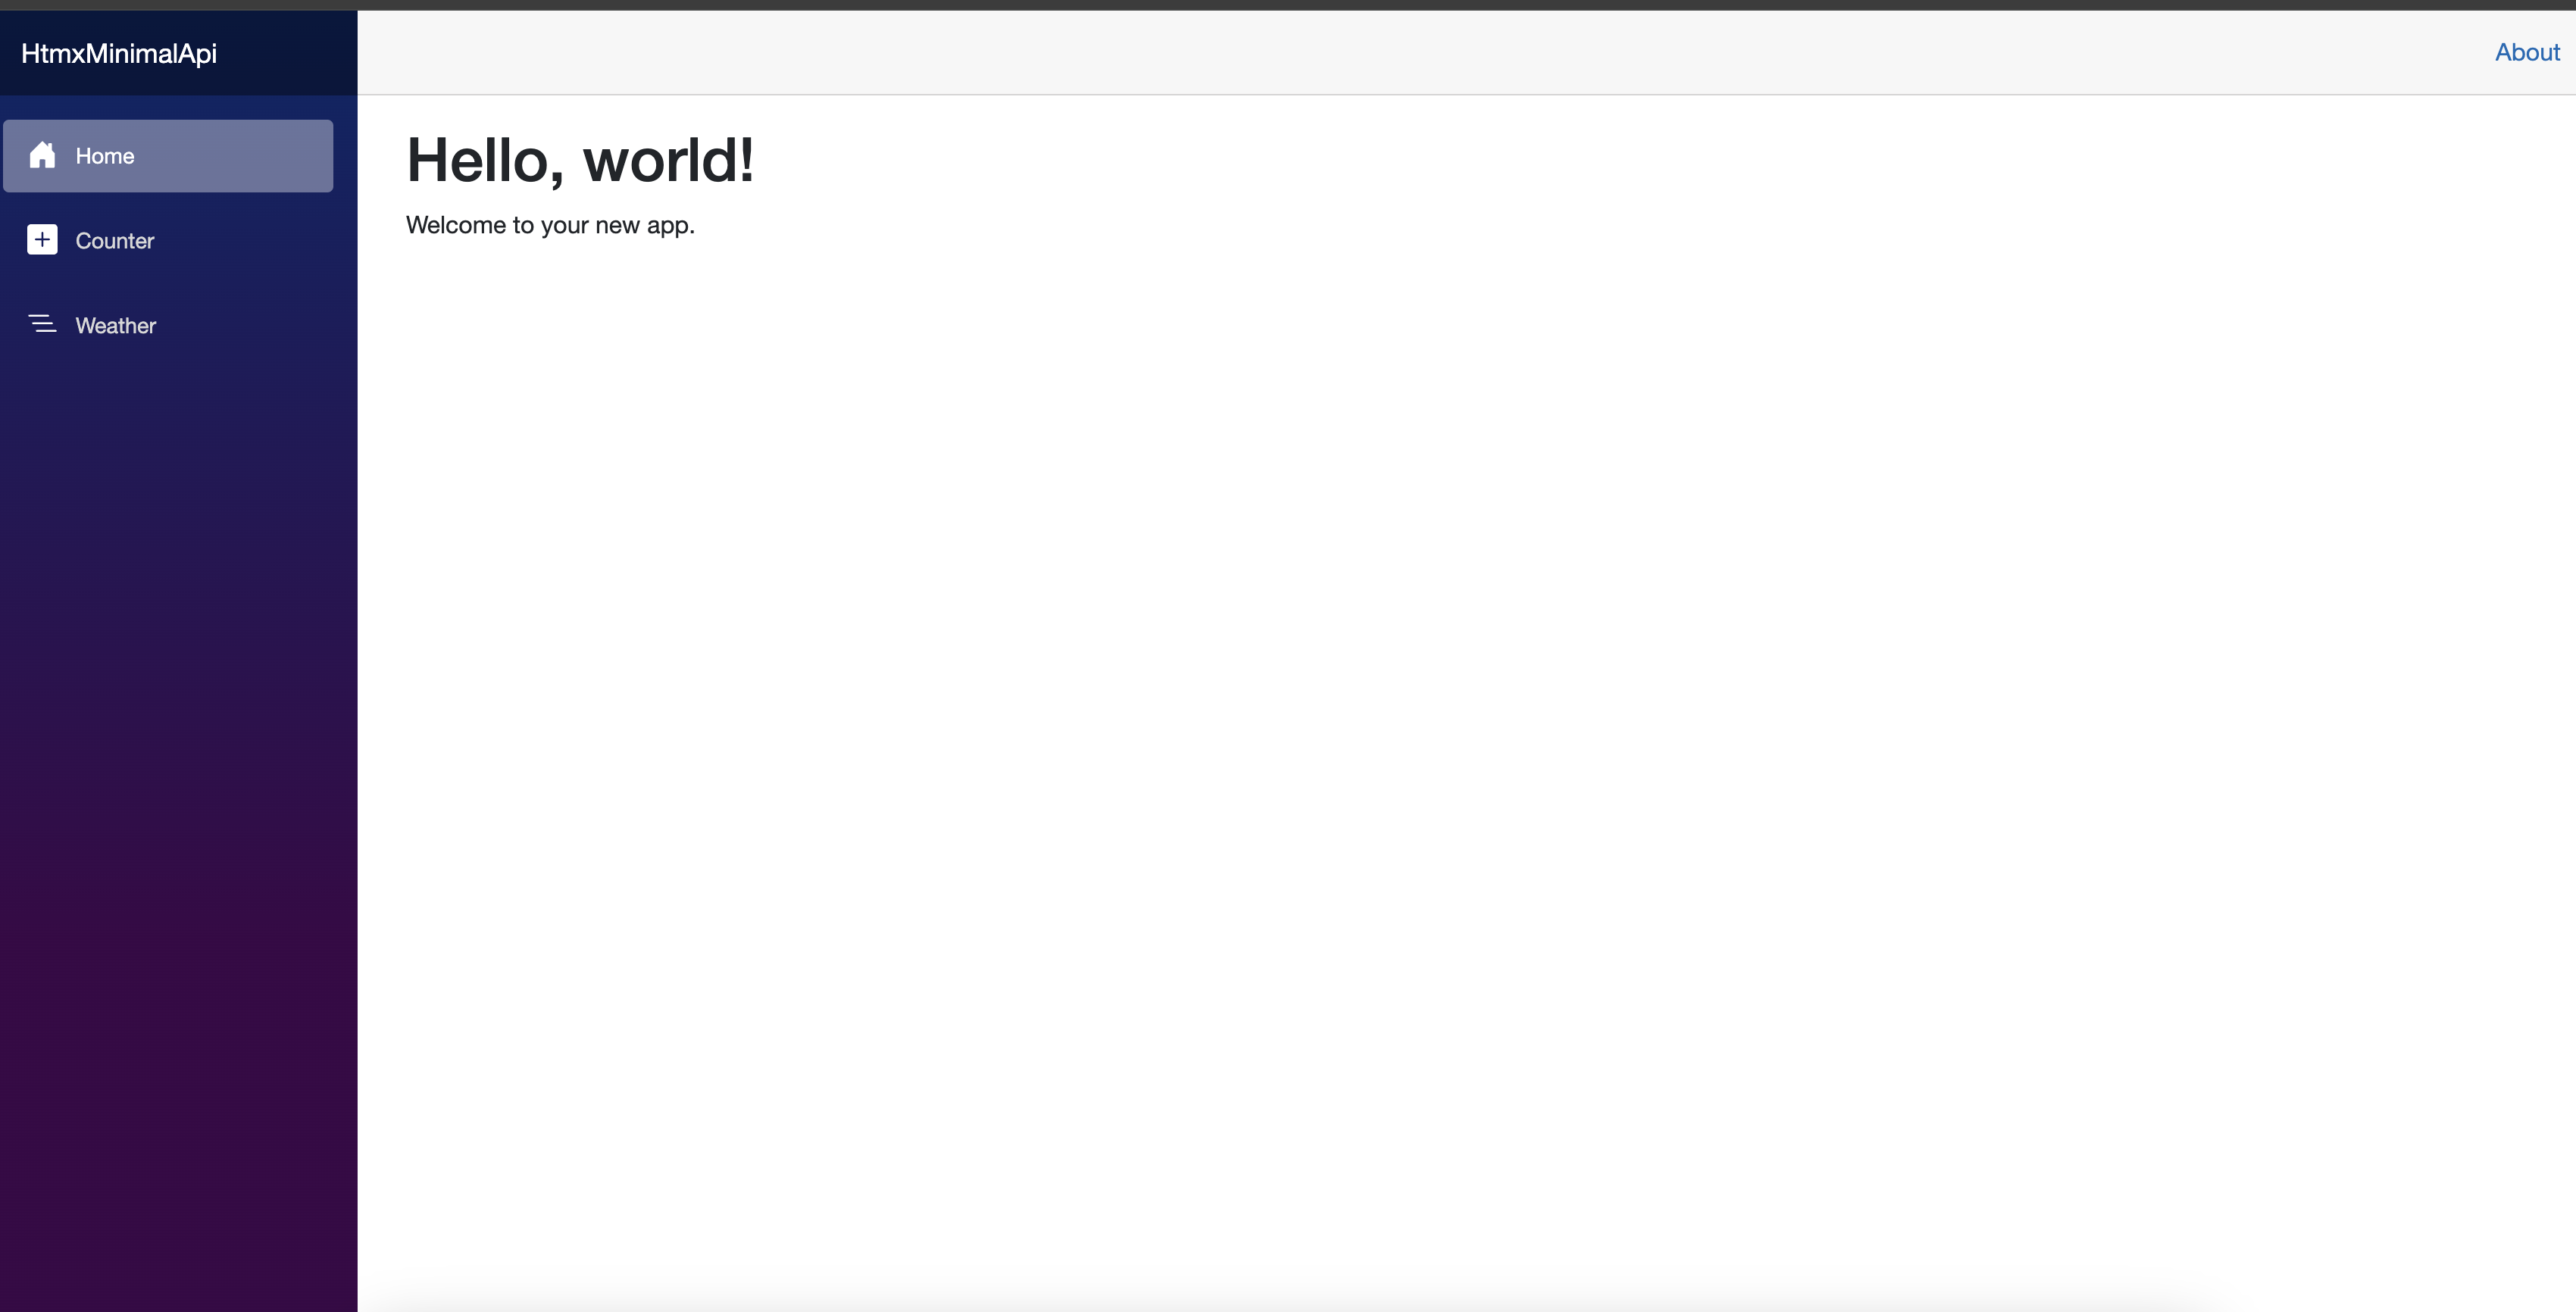
Home sweet home.
Routing To Another Page
I am going to do the Counter.razor page next. All that needs done is add another route to Program.cs and copy over Counter.razor from the template.
// Program.cs
var builder = WebApplication.CreateBuilder(args);

builder.Services.AddRazorComponents();

var app = builder.Build();

app.UseHttpsRedirection();
app.UseStaticFiles();

app.MapGet("/", ()
    => new RazorComponentResult<Home>());
app.MapGet("/counter", ()
    => new RazorComponentResult<Counter>()); // New endpoint.

app.Run();
<!-- Features/Counter.razor -->
@layout HtmxLayout <!-- Remove routing and add the layout since every page is independent.-->

<PageTitle>Counter</PageTitle>

<h1>Counter</h1>

<p role="status">Current count: @currentCount</p>

<button class="btn btn-primary" @onclick="IncrementCount">Click me</button>

@code {
    private int currentCount = 0;

    private void IncrementCount()
    {
        currentCount++;
    }
}
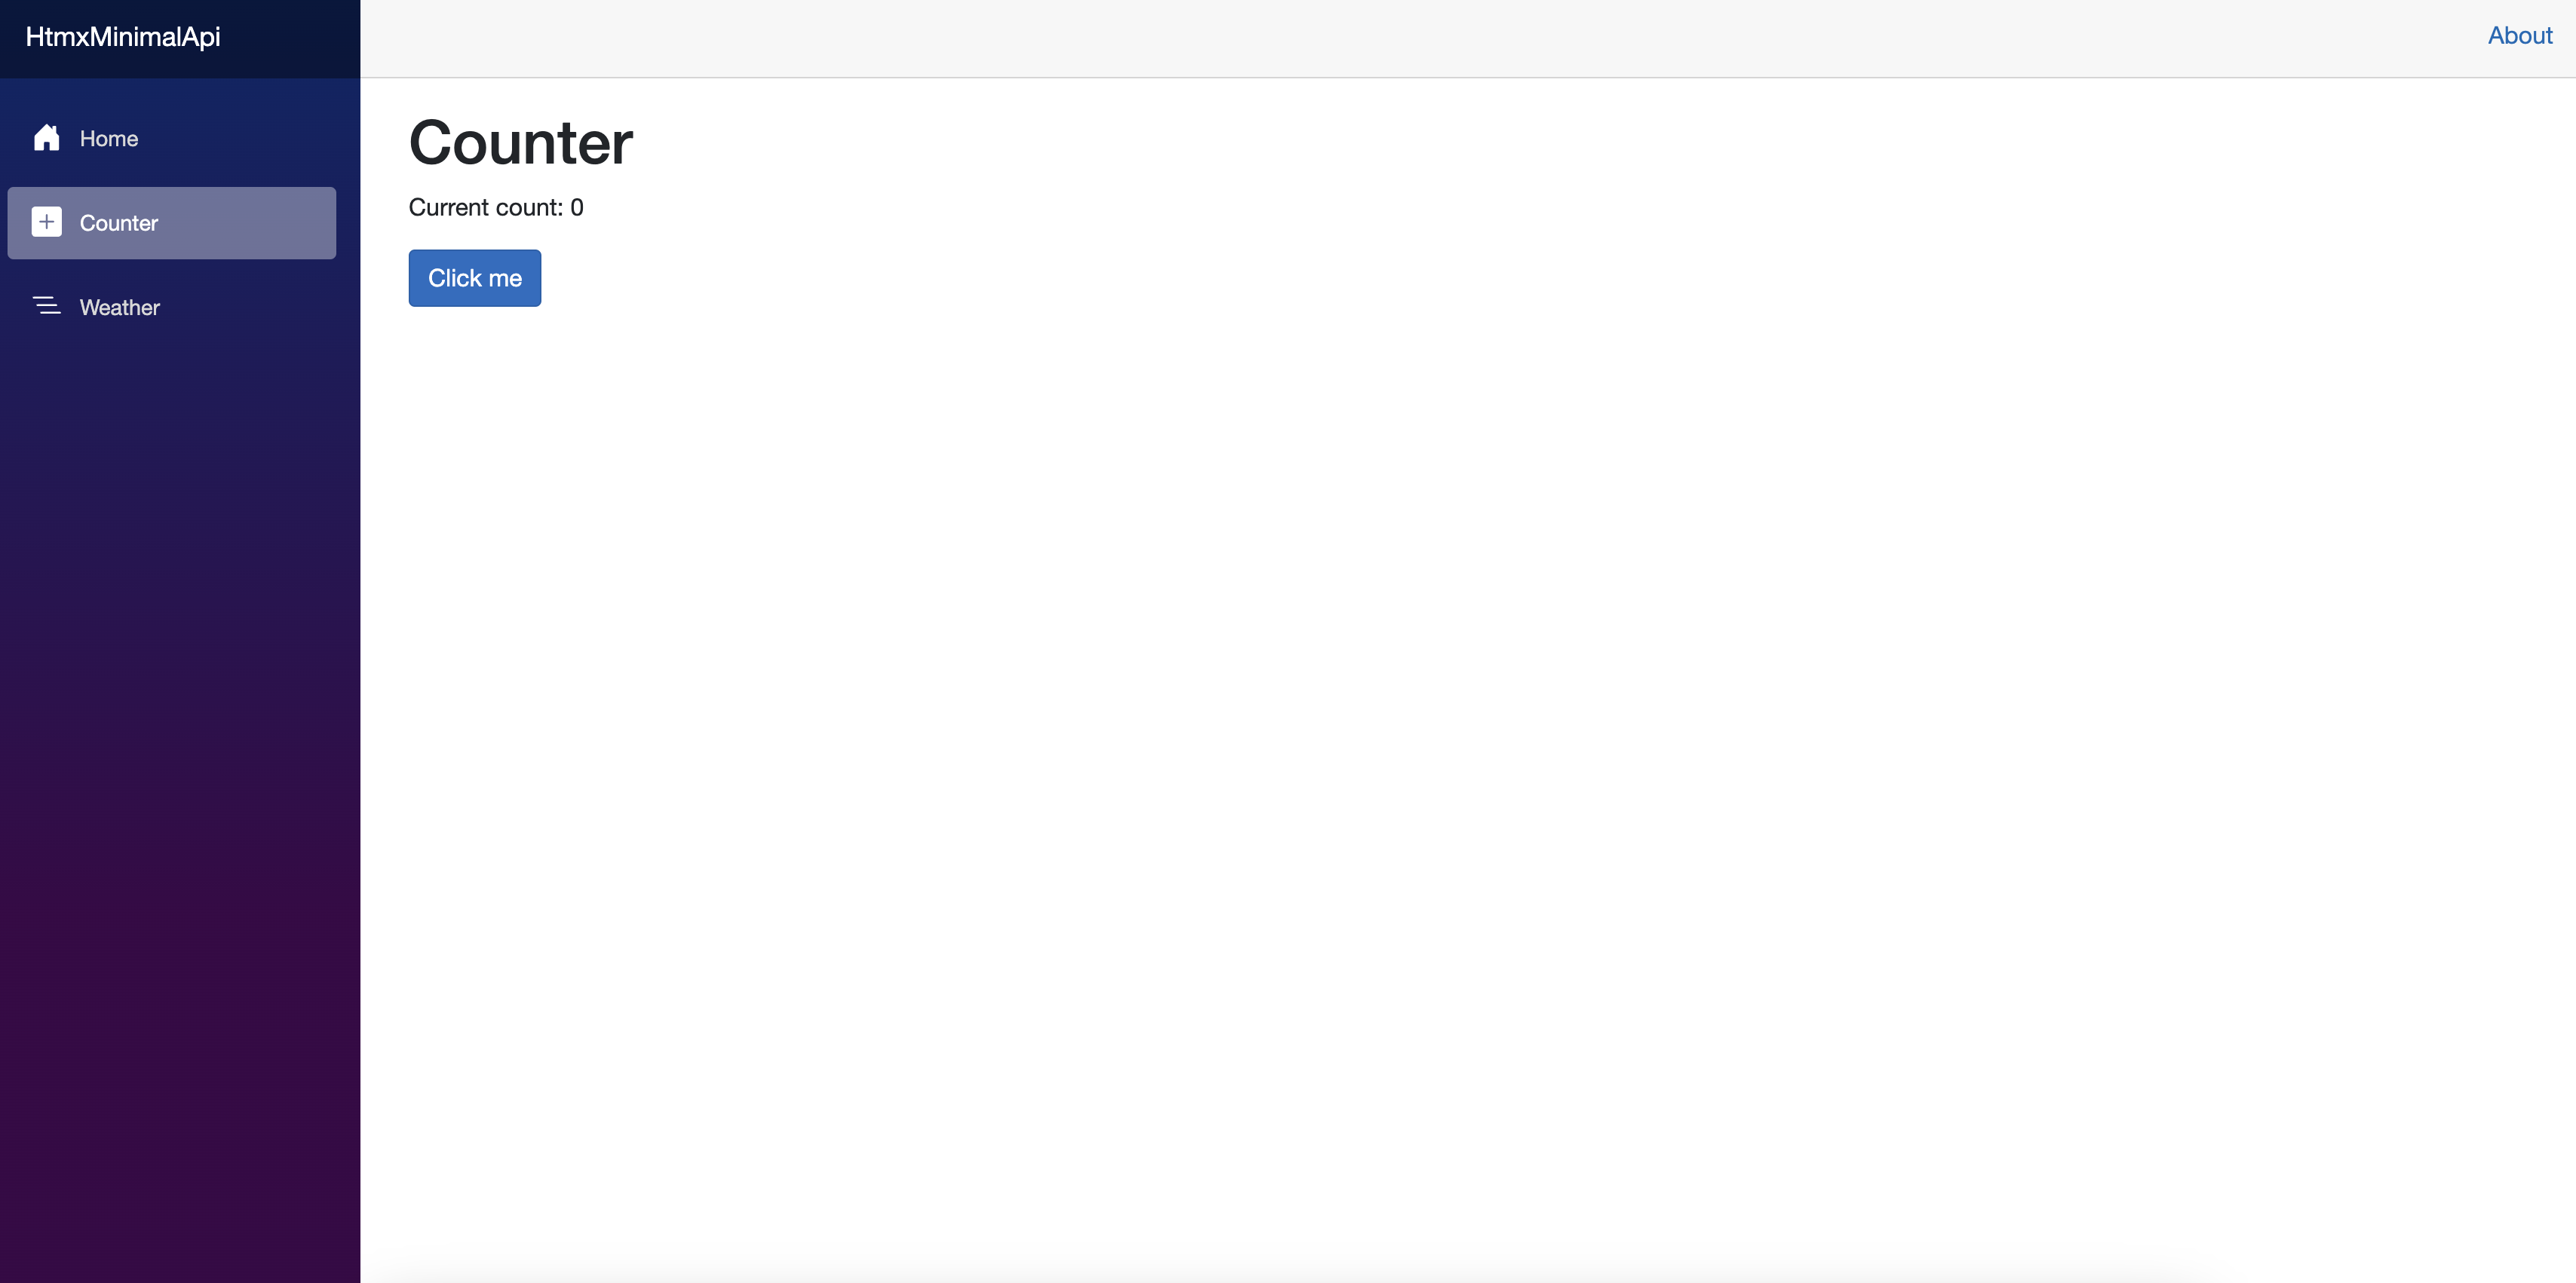
The counter page.
But wait - the counter button doesn’t work!
The First Island of Interactivity
When the button is clicked, the counter needs to increment up by one. Since the only state is the hypermedia itself 😎, we will need to refresh the HTML on the page in order for the counter to increment. HTMX is not even needed at this point just plain hyperlinks and query parameters, as showcased below.
<!-- Features/Counter.razor -->
@layout HtmxLayout

<PageTitle>Counter</PageTitle>

<h1>Counter</h1>

<p role="status">Current count: @CurrentCount</p>

<a class="btn btn-primary" href="/counter?currentCount=@CurrentCount">Click me</a> <!-- This is now an anchor tag. -->

@code
{
    [Parameter] public int CurrentCount { get; set; }
}
The endpoint can be updated with an optional route parameter that accepts a current count and increments it by one.
// Program.cs
using HtmxMinimalApi.Features;
using Microsoft.AspNetCore.Http.HttpResults;
using Microsoft.AspNetCore.Mvc;

var builder = WebApplication.CreateBuilder(args);

builder.Services.AddRazorComponents();

var app = builder.Build();

app.UseHttpsRedirection();
app.UseStaticFiles();

app.MapGet("/", ()
    => new RazorComponentResult<Home>());
app.MapGet("/counter", ([FromQuery] int? currentCount = 0)
    => new RazorComponentResult<Counter>(new {CurrentCount = currentCount + 1})); // Updated endpoint.

app.Run();
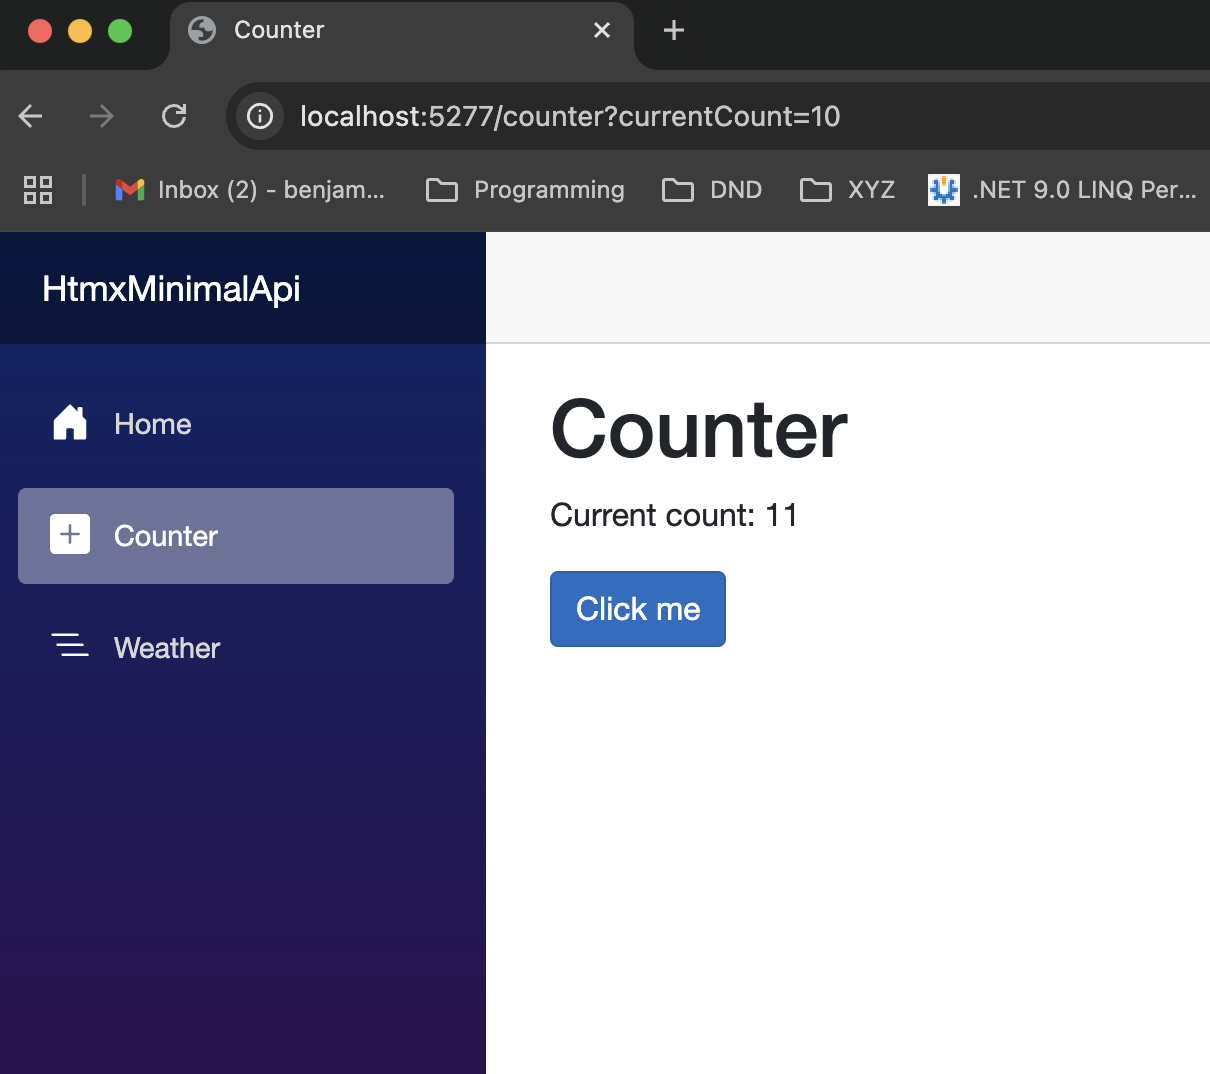
Counting increments by one when clicked using server side rendering.
This has some obvious downsides stemming from the largest one that the entire page is being re-rendered:
- We are shipping a lot of html back and forth which is a lot of bytes.
- The state of the page (the hypermedia-only state) needs to be entirely rebuilt from scratch. This application is simple but most are not.
- Because the page is being entirely rebuilt from scratch database calls to rebuild things on the navbar (like a cart counter) and whatnot need requeried and rebuilt.
That being said, javascript disabled devices can still use the site.
Enter HTMX. There are a few things that HTMX does out of the box which are built for this. To be reductive (those interested can read the documentation), a delta of the existing DOM and the new DOM is taken and a swap of content. Nothing that the browser doesn’t technically do anyway. The calls are perfomed via AJAX.
Let’s tweak the counter to use HTMX. I’m going to place an id tag on the place we want to “refresh” or swap the html. Additionally, placing hx-target and hx-get tags on the <a> tag will do the following:
- When the anchor tag is clicked
- HTMX performs an AJAX call to the target url specified in the
hx-getattribute value. The request is the GET verb since that is the attribute we used. - When the request returns, place the response into the location of the
hx-target.
A separate component is desired so that whenever we click the button we only return the new state of the html page exactly where we want to update it.
Full code is below:
// Program.cs - rest of code omitted.
app.MapGet("/counter", ()
    => new RazorComponentResult<Counter>()); // Moved back to original state.
app.MapGet("/counter/increment", ([FromQuery] int? currentCount = 0)
    => new RazorComponentResult<CounterInfo>(new { CurrentCount = currentCount + 1 })); // New endpoint.
<!-- Features/Counter.razor -->
@layout HtmxLayout

<PageTitle>Counter</PageTitle>

<h1>Counter</h1>

<CounterInfo/>
<!--  Features/CounterInfo.razor -->
<!-- There is no layout because this is a "partial" or component being returned - not a page.-->
<div id="counter">
    <p role="status">
        @CurrentCount
    </p>

    <a class="btn btn-primary" hx-get="/counter/increment?currentCount=@CurrentCount" hx-target="#counter">Click me</a>
</div>

@code
{
    [Parameter] public int CurrentCount { get; set; }
}
The request back from the new /counter/increment endpoint when the anchor button clicked is the following:
<div id="counter"><p role="status">1</p>

<a class="btn btn-primary" hx-get="/counter/increment?currentCount=1" hx-target="#counter">Click me</a></div>
Very good! We’re just re-generating the HTML we need to change the state of the web page and HTMX is swapping it onto the target.
As an aside, since we are using HTMX to enhance the anchor it could technically be any element as long as the hx- elements are present.
Do note that by opting to put this functionality on any element, degraded clients (those without javascript) may need a workaround or suffer degraded features.
Speaking of degraded features, the current implementation does not degrade well. Let’s fix that.
Posting A Form
HTMX borrows the term progressive enhancement to describe enriching the user experience and providing greater interactivity for web applications. However, there are situations where clients have to operate in a javascriptless state. Whether this is a concern to you or not is dependent upon your use case and it is up to you to make the choice what level of degradation is appropriate and where to degrade gracefully. With javascript frameworks or Blazor Web that require javascript to work, your site is likely completely inoperable.
With HTMX, I do have some options. I’m going to pick one of them - wrapping the counter in a form. There are some new things we are going to do:
- Add a form tag with an action tag pointing to
counter/incrementand a method ofget. - Add a hidden input with the name
currentCountand value of the current count. - Turn the
<a>button back into a<button>
An added advantage that you might notice in your browser search bar is that the current count shows up as a query parameter. That’s pretty neat because, again, we’re leveraging the browser itself to be able to restore the state of the hypermedia. The Blazor starter template link returns the counter to zero when you directly navigate there. Using traditional hypermedia, we can accept parameters naturally to restore the state. Of course, you can do this too with Blazor Web SSR which is to its advantage too!
Here is the code:
With Degradation Support
Note
A reminder that this type of degradation handling is optional and use-case dependent.
// Program.cs
// Code omitted for brevity...
app.MapGet("/counter", ([FromQuery] int? currentCount = 0) =>
    new RazorComponentResult<Counter>(new { currentCount })); // Support direct navigating via url to restore the counter.
app.MapGet("/counter/increment", Results<RazorComponentResult<Counter>, RazorComponentResult<CounterInfo>>
    (HttpContext httpContext, [FromQuery] int? currentCount = 0) =>
    {
        currentCount++;
        if (httpContext.Request.Headers.ContainsKey("HX-Request")) // HTMX sends this header when it sends the request so we can operate differently.
        {
            return new RazorComponentResult<CounterInfo>(new { currentCount }); // Return just the component when its an HTMX request.
        }

        return new RazorComponentResult<Counter>(new { currentCount }); // Return the whole page in a degraded scenario.
    });
<!-- Features/Counter.razor-->
@layout HtmxLayout

<PageTitle>Counter</PageTitle>

<h1>Counter</h1>

<CounterInfo CurrentCount="CurrentCount"/>

@code
{
    [Parameter] public int CurrentCount { get; set; }
}
<!-- Features/CounterInfo.razor -->
<form id="counter" action="/counter/increment" hx-swap="outerHTML" method="get" hx-boost="true" hx-target="#counter">
    <input type="hidden" name="@nameof(CurrentCount)" value="@CurrentCount"/>
    <p role="status">
        @CurrentCount
    </p>

    <button class="btn btn-primary">Click me</button>
</form>

@code
{
    [Parameter] public int CurrentCount { get; set; }
}
Without Degradation Support
If you do not want to handle degradation, the resulting code looks like this:
<!-- Features/CounterInfo.razor -->
<form id="counter" hx-get="counter/increment?currentCount=@CurrentCount" hx-swap="outerHTML"  hx-target="#counter">
    <p role="status">
        @CurrentCount
    </p>

    <button class="btn btn-primary">Click me</button>
</form>

@code
{
    [Parameter] public int CurrentCount { get; set; }
}
// Program.cs
// Code omitted for brevity...
app.MapGet("/counter/increment", ([FromQuery] int? currentCount = 0)
    => new RazorComponentResult<CounterInfo>(new { CurrentCount = currentCount + 1 });
Validation
To demonstrate validation we’re going to go off-sample and add a name field to the counter page. I like the package called FluentValidation so much and honestly I feel like most people are not using DataAnnotations for API-surface validation beyond very simple scenarios or for demos.
I am going to install that in the project and prepare the form for that field. Let’s do the following:
- Install the fluent validation package.
- Add a class with a validator.
- Adding a reference in
_Imports.razor. - Adding antiforgery support to the minimal api middleware.
- Include the antiforgery token inside the form.
- When validation fails, show the messages on the form.
- Update the minimal api endpoint to return the component if validation fails with the messages.
Package Install and Validator
We must first install the FluentValidation package via the IDE’s nuget package manager or via CLI dotnet add package FluentValidation and then we can create the following class:
public class CounterForm
{
    public int? CurrentCount { get; set; }
    public string? Name { get; set; }

    public class CounterFormValidator : AbstractValidator<CounterForm>
    {
        public CounterFormValidator() => RuleFor(m => m.Name).NotEmpty();
    }
}
Additionally, I am going to update the _Imports.razor file with @using FluentValidation.Results.
Adding Antiforgery Support
First, we need to add the minimal api middleware so that we can use the [FromForm] attribute that is new in .NET 8.
// Program.cs
// Code omitted for brevity...
var builder = WebApplication.CreateBuilder(args);

builder.Services.AddRazorComponents();

var app = builder.Build();

app.UseHttpsRedirection();
app.UseStaticFiles();
app.UseAntiforgery(); // Add this line.
The antiforgery token razor boilerplate is a little verbose but necessary in order to be able to send form posts.
Essentially, we need to inject the current HttpContext and IAntiforgery service into a component, which I have named HtmxAntiforgeryToken.razor, then generate the tokens,
and finally include a hidden input with the token values so that the form post can include them. This looks like the below.
<!-- Features/Shared/HtmxAntiforgeryToken.razor -->
@using Microsoft.AspNetCore.Antiforgery

<input type="hidden" name="@_antiforgeryFieldName" value="@_antiforgeryToken" />

@code {
    [CascadingParameter] public HttpContext HttpContext { get; set; } = null!;
    [Inject] public IAntiforgery Antiforgery { get; set; } = null!;

    private string _antiforgeryToken = string.Empty;
    private string _antiforgeryFieldName = string.Empty;

    protected override void OnParametersSet()
    {
        var set = Antiforgery.GetAndStoreTokens(HttpContext);

        _antiforgeryToken = set.RequestToken!;
        _antiforgeryFieldName = set.FormFieldName;
    }
}
Adding Validation Messages
Just like the antiforgery token there is a little bit of boilerplate needed in order to return the messages. We are going to tap into Blazor’s existing form logic via FieldIdentifier in order to streamline as much as we can. Additionally, I wanted this to feel like other component libraries (including Blazor’s own).
Here is the code
<!-- Features/Shared/HtmxValidationMessage.razor -->
@using System.Linq.Expressions
@typeparam TValue

@if (HasError(For))
{
    <div class="text-danger">@Message</div>
}

@code {
    [CascadingParameter] public ValidationResult ValidationResult { get; set; } = new();
    [Parameter, EditorRequired] public Expression<Func<TValue>>? For { get; set; }

    private string? Message { get; set; }

    private bool HasError(Expression<Func<TValue>>? @for)
    {
        var fieldIdentifier = FieldIdentifier.Create(@for!);

        var error = ValidationResult.Errors.FirstOrDefault(x => x.PropertyName == fieldIdentifier.FieldName);

        if (error == null) return false;

        Message = error.ErrorMessage;

        return true;
    }
}
Updating The Minimal API Endpoint
Since we created the CounterForm model our endpoints need to return that into our component and page.
Additionally, when we submit a post request we need to run our validation and return the result back into CounterInfo.razor.
// Program.cs
// Code omitted for brevity...
app.MapGet("/counter", ([FromQuery] int? currentCount = 0) =>
    {
        var form = new CounterForm { CurrentCount = currentCount };
        return new RazorComponentResult<Counter>(new { CounterForm = form });
    });
app.MapPost("/counter/increment",  RazorComponentResult<CounterInfo>([FromForm] CounterForm form) =>
    {
        var validator = new CounterForm.CounterFormValidator();
        var result = validator.Validate(form);
        if (!result.IsValid) return new(new { CounterForm = form, ValidationResult = result });

        form.CurrentCount++;
        return new(new { CounterForm = form });
    });
Tie It All Together
Note
Want to just see the code? Click here!
Bringing this all together, we need to utilize more of the Blazor framework in order to pass the validation result down to all our validation messages. Additionally, we need to add our HtmxAntiforgeryToken and HtmxValidationMessage.
<!-- Features/CounterInfo.razor -->
<CascadingValue Value="ValidationResult">
    <!-- By default, HTMX will place the results from `hx-post` inside the element ("innerHTML"). We want to replace the entire body including the <form> tag so that they don't inadvertently nest. -->
    <form id="counter" hx-post="counter/increment" hx-swap="outerHTML" hx-target="#counter">
        <HtmxAntiforgeryToken />
        <input type="number" value="@CounterForm.CurrentCount" name="@nameof(CounterForm.CurrentCount)" class="form-control-plaintext w-100"/>
        <label class="w-100">
            Counter Submission Name
            <InputText @bind-Value="CounterForm.Name" name="@nameof(CounterForm.Name)"/>
            <HtmxValidationMessage For="() => CounterForm.Name "/>
        </label>
        <button class="btn btn-primary">Click me</button>
    </form>
</CascadingValue>

@code
{
    [Parameter] public CounterForm CounterForm { get; set; } = new();
    [Parameter] public ValidationResult ValidationResult { get; set; } = new();
}
<!-- Features/Counter.razor -->
@layout HtmxLayout

<PageTitle>Counter</PageTitle>

<h1>Counter</h1>

<CounterInfo CounterForm="CounterForm"/>

@code
{
    [Parameter] public CounterForm CounterForm { get; set; } = new();
}
If I click the button without putting in a name the form correctly returns the new state (and only the new form state) back to me - no full page reload!
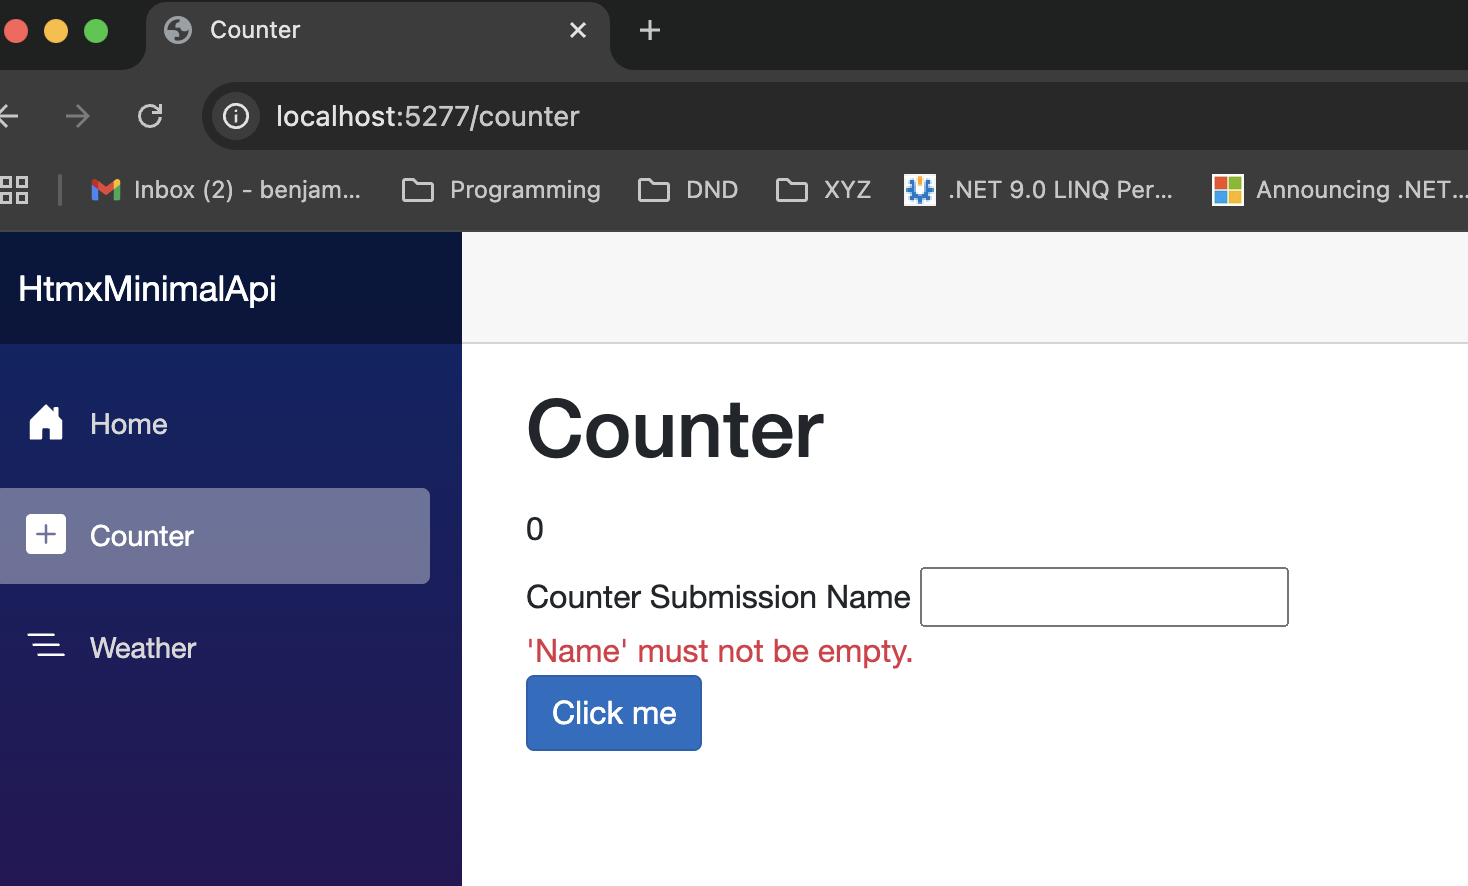
A happy failure message.
Swapping Content Somewhere Else
So we can easily swap content using a button inside of a form that really just mutates the form itself as I just demonstrated.
But consider a scenario where I click on a button and then it should update some piece of html somewhere else.
The obvious use-case is a e-commerce page with items you can add to your cart. The number of items in your cart usually resides outside of the shopping area and needs updated every time something is
added to the cart.
HTMX triggers operate by sending headers back through the response from the server via HX-Trigger so something like a added-to-cart event would be sent once the item is successfully added to the cart.
To provide a contrived example I am going to add a success message at the top of our HtmxLayout that we can tap into when something is successful.
<!-- Features/Shared/HtmxLayout.razor
    Code omitted for brevity.
 -->
<div class="page">
    <div class="sidebar">
        <NavMenu/>
    </div>

    <main>
        <div class="top-row px-4">
            <a href="https://learn.microsoft.com/aspnet/core/" target="_blank">About</a>
        </div>

        <article class="content px-4">
            <!-- Alert added here with a trigger that will fire anytime a response is received with a header called `success-alert` -->
            <div hx-trigger="success-alert from:body" hx-get="/success-alert"></div>
            @Body
        </article>
    </main>
</div>
For the alert I am going to put it in a separate component that can be rendered by a new minimal api endpoint.
<!-- Features/Shared/SuccessAlert.razor -->
<div class="alert alert-success" role="alert">
    Success!
</div>
Finally, here is the new endpoint showing the HX-Trigger header and the new /success-alert endpoint.
// Program.cs
// Code omitted for brevity.
app.MapPost("/counter/increment", RazorComponentResult<CounterInfo>([FromForm] CounterForm form, HttpContext httpContext) =>
    {
        var validator = new CounterForm.CounterFormValidator();
        var result = validator.Validate(form);
        if (!result.IsValid) return new(new { CounterForm = form, ValidationResult = result });

        httpContext.Response.Headers.Append("HX-Trigger", "success-alert"); // Append a header called 'HX-Trigger', which HTMX understands, with a value of 'success-alert'.

        form.CurrentCount++;
        return new(new { CounterForm = form });
    });

app.MapGet("/success-alert", () => new RazorComponentResult<SuccessAlert>()); // New endpoint.
This results in a success message displaying when I successfully submit the form. Yay! Again, this is possible because we don’t actually swap the entire page we only swap the tiny piece of html that we need to change the state to what is needed.
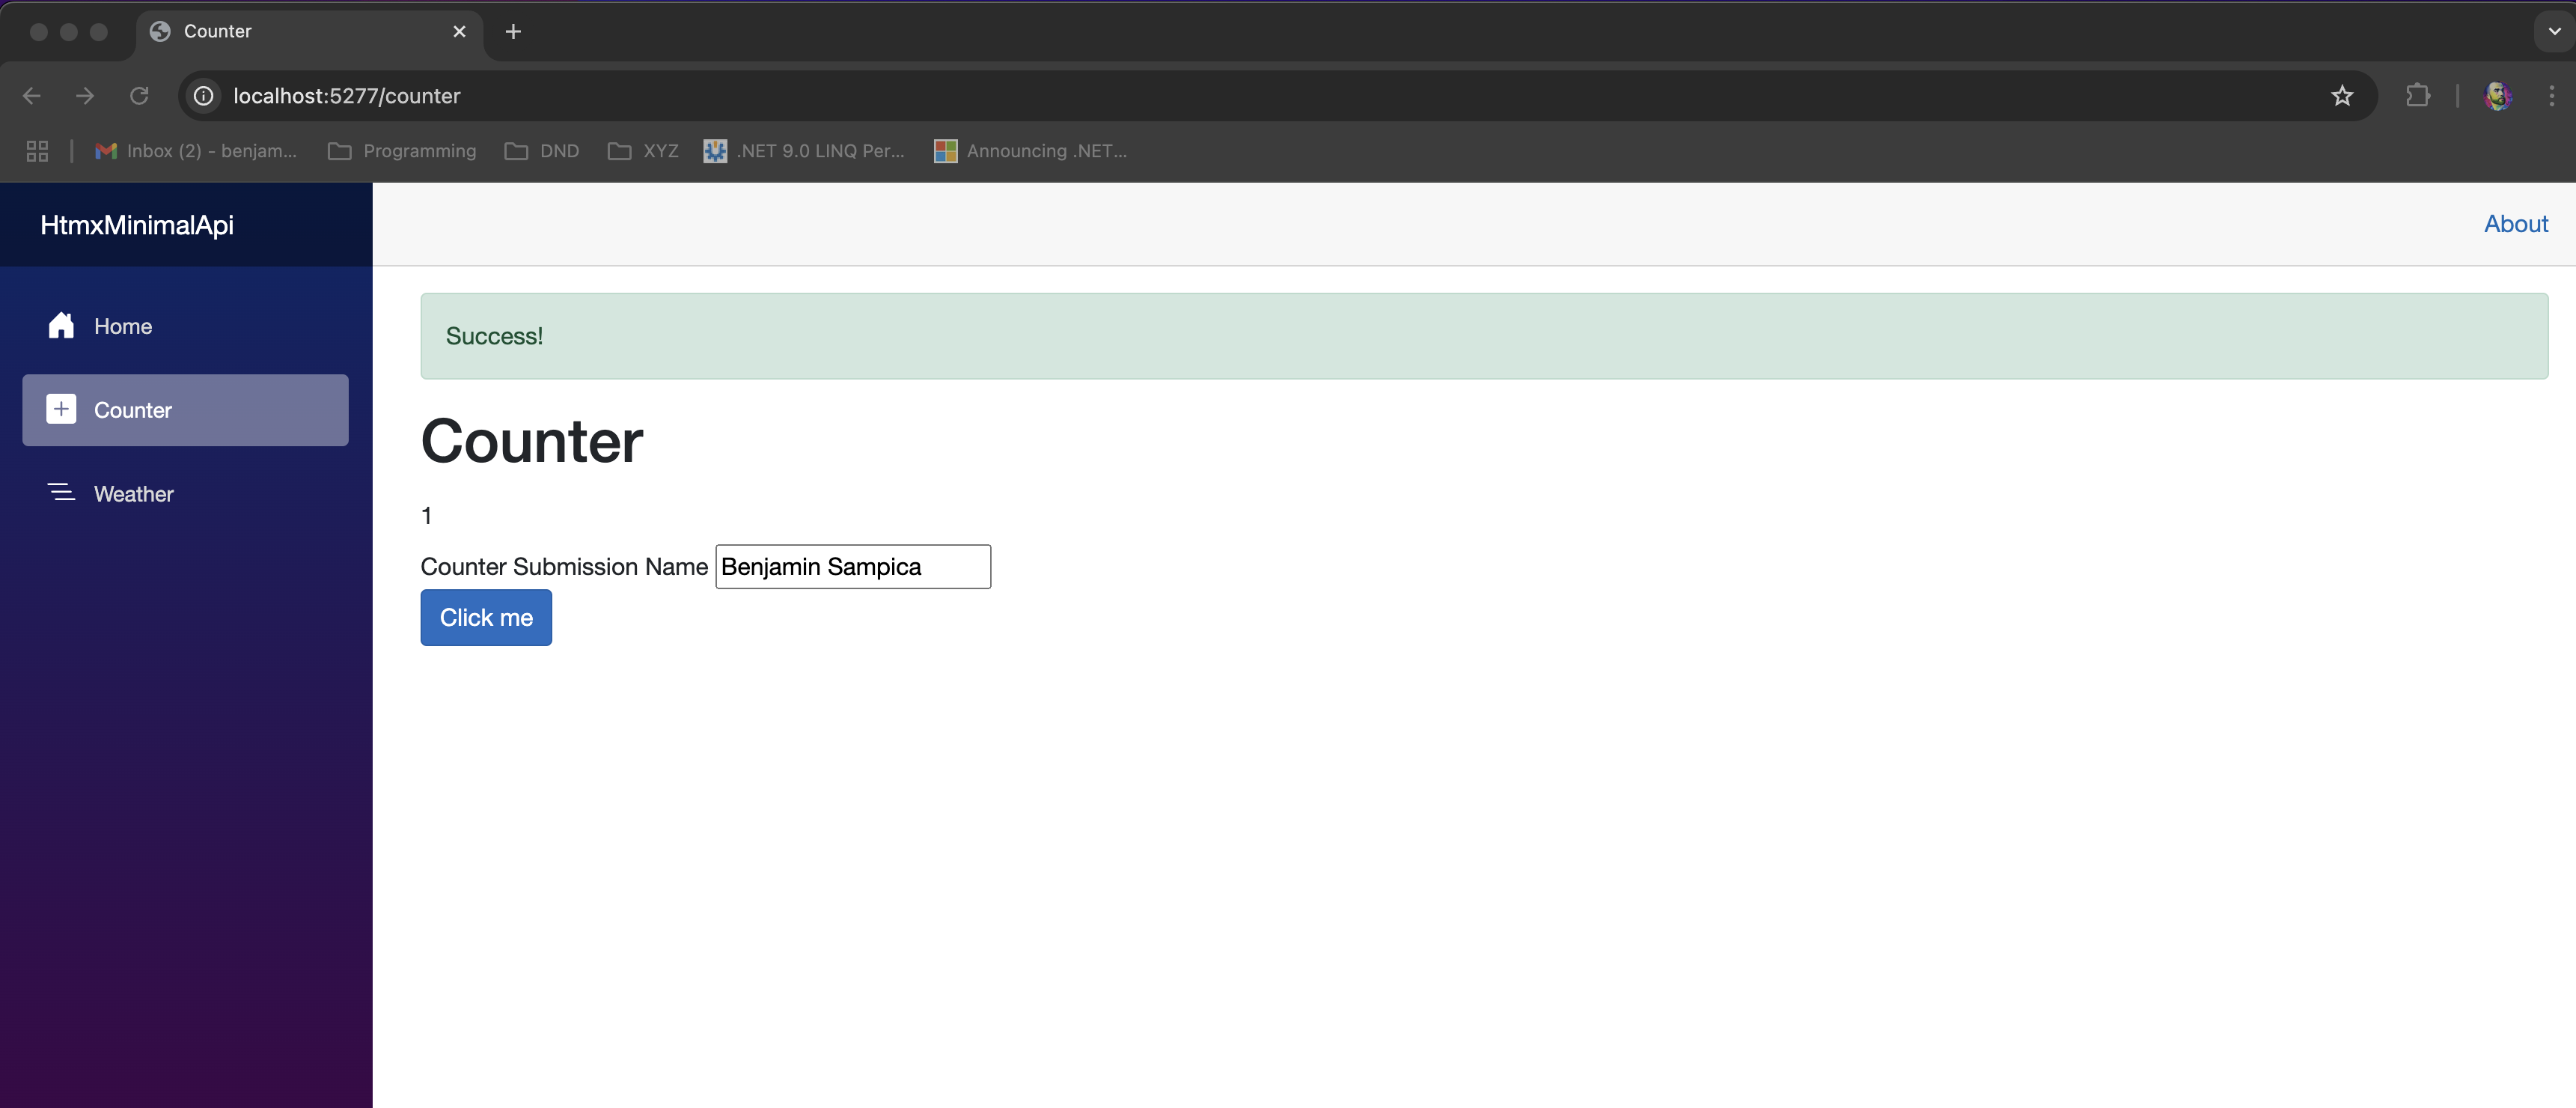
Success!
Tip
Another way to handle content swapping somewhere else is to use out-of-band swaps which you can learn more about here.
Table Data With Paging
A common problem that we need to solve is showing tabular data. With HTMX, this is no problem at all. I am going to reimplement the sample /weather page to
server-side page with data. Lets break this down into what we need to do:
- When the page first loads, show a loading spinner.
- Send an HTTP request to load the table with data.
- When I press “Back” we should requery the data and decrease the page number count until page is 1, at which point we want to disable the button.
- When I press “Forward” we should requery the data and increase the page number count, at which point we want to disable the button when there are no more results.
Fast-forwarding from what we have already learned from the previous sections we can easily use HTMX to do this.
Weather That Shows No Data
Let’s get all the boilerplate out of the way that we know we are going to need. First, we’re going to add some components and pages. These deviate slightly from the sample pages but largely it is the same concept.
<!-- Features/Weather.razor -->
@layout HtmxLayout

<PageTitle>Weather</PageTitle>

<h1>Weather</h1>

<p>This component demonstrates showing data.</p>

<form hx-get="/weather" hx-trigger="load"> <!-- When the page loads, fetch data from /weather.-->
</form>
<!-- Features/WeatherList.razor -->
<table class="table">
    <thead>
    <tr>
        <th>Date</th>
        <th>Temp. (C)</th>
        <th>Temp. (F)</th>
        <th>Summary</th>
    </tr>
    </thead>
    <tbody>
    @foreach (var forecast in Forecasts)
    {
        <tr>
            <td>@forecast.Date.ToShortDateString()</td>
            <td>@forecast.TemperatureC</td>
            <td>@forecast.TemperatureF</td>
            <td>@forecast.Summary</td>
        </tr>
    }
    </tbody>
</table>

@code {
    [Parameter] public ICollection<WeatherForecast> Forecasts { get; set; } = [];

    public class WeatherForecast
    {
        public DateOnly Date { get; set; }
        public int TemperatureC { get; set; }
        public string? Summary { get; set; }
        public int TemperatureF => 32 + (int)(TemperatureC / 0.5556);
    }
}
Next, I am going to just add a single new endpoint to our Program.cs file that is setting up our initial state.
// Program.cs
// Code omitted for brevity.
app.MapGet("/weather", async Task<Results<RazorComponentResult<Weather>, RazorComponentResult<WeatherList>>> (HttpContext httpContext) =>
{
    // HTMX sends this header when the request is sent by HTMX.
    var isHtmxRequest = httpContext.Request.Headers.ContainsKey("HX-Request");
    // HTMX sends this header when the request is boosted. A boosted request happens when the anchor link is clicked on the navbar.
    var isBoosted = httpContext.Request.Headers.ContainsKey("HX-Boosted");
    if (!isHtmxRequest || isBoosted) // If a user directly navigates to the page (non-HTMX) OR the anchor link is clicked on the navbar.
    {
        return new RazorComponentResult<Weather>(); // Return the page.
    }

    return new RazorComponentResult<WeatherList>(); // Send just the component.
});
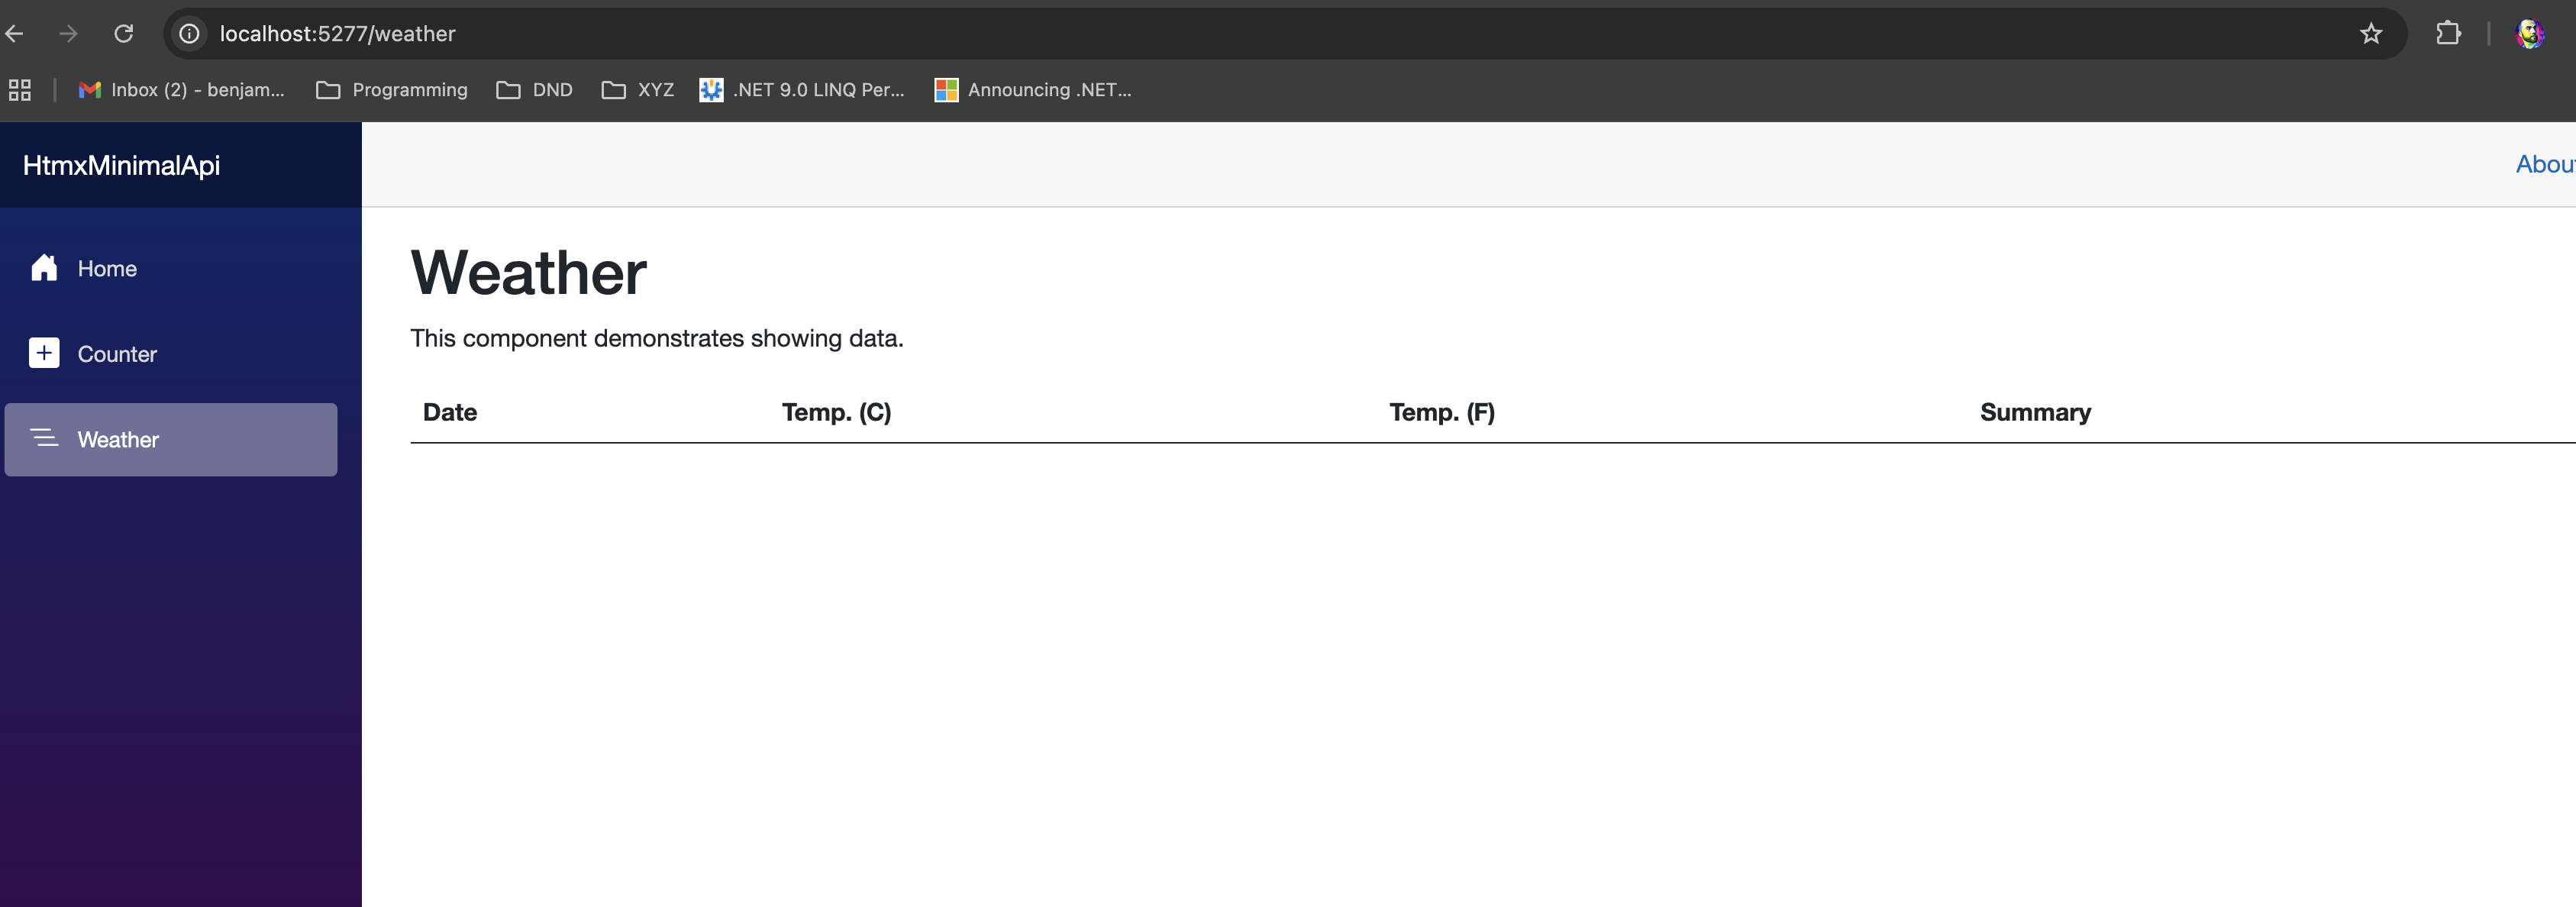
The empty weather page.
Loading
Now, let’s handle the case where the server takes a moment to show weather data but we want to show the user something while we are waiting.
For this, HTMX has us covered! We can add an attribute called hx-indicator (documentation) which will, when an HTMX request occurs, have a class called htmx-request added to it.
Here’s the Loading.razor component with that in mind.
<!-- Features/Shared/Loading.razor -->
<div class="d-flex justify-content-center align-items-center">
    <div class="spinner-border text-primary htmx-indicator" style="width: 10em; height: 10em; "/>
</div>
We haven’t touched app.css yet since the inital boilerplate but now we are going to modify this global css file to add some styles to show our spinner based on hx-indicator and htmx-request.
/* wwwroot/app.css */
.htmx-indicator {
   display: none;
}

.htmx-request .htmx-indicator, .htmx-request.htmx-indicator {
    display: inline;
}
Finally, we are going to add the Loading.razor component to our Weather page inside the form and then add a delay to the endpoint so we can see it.
We want the loading component to be inside the form so that the loading disappears when the request from the server returns - replacing the content within.
<!-- Features/Weather.razor
    Code omitted for brevity.
    -->
<form hx-get="/weather" hx-trigger="load">
    <Loading />
</form>
// Program.cs
// Code omitted for brevity.

app.MapGet("/weather", Results<RazorComponentResult<Weather>, RazorComponentResult<WeatherList>>(HttpContext httpContext) =>
{
    // HTMX sends this header when the request is sent by HTMX.
    var isHtmxRequest = httpContext.Request.Headers.ContainsKey("HX-Request");
    // HTMX sends this header when the request is boosted. A boosted request happens when the anchor link is clicked on the navbar.
    var isBoosted = httpContext.Request.Headers.ContainsKey("HX-Boosted");
    if (!isHtmxRequest || isBoosted) // If a user directly navigates to the page (non-HTMX) OR the anchor link is clicked on the navbar.
    {
        return new RazorComponentResult<Weather>(); // Return the page.
    }

    await Task.Delay(5000); // Delay for 5 seconds to simulate long loading.

    return new RazorComponentResult<WeatherList>(); // Send just the component.
});
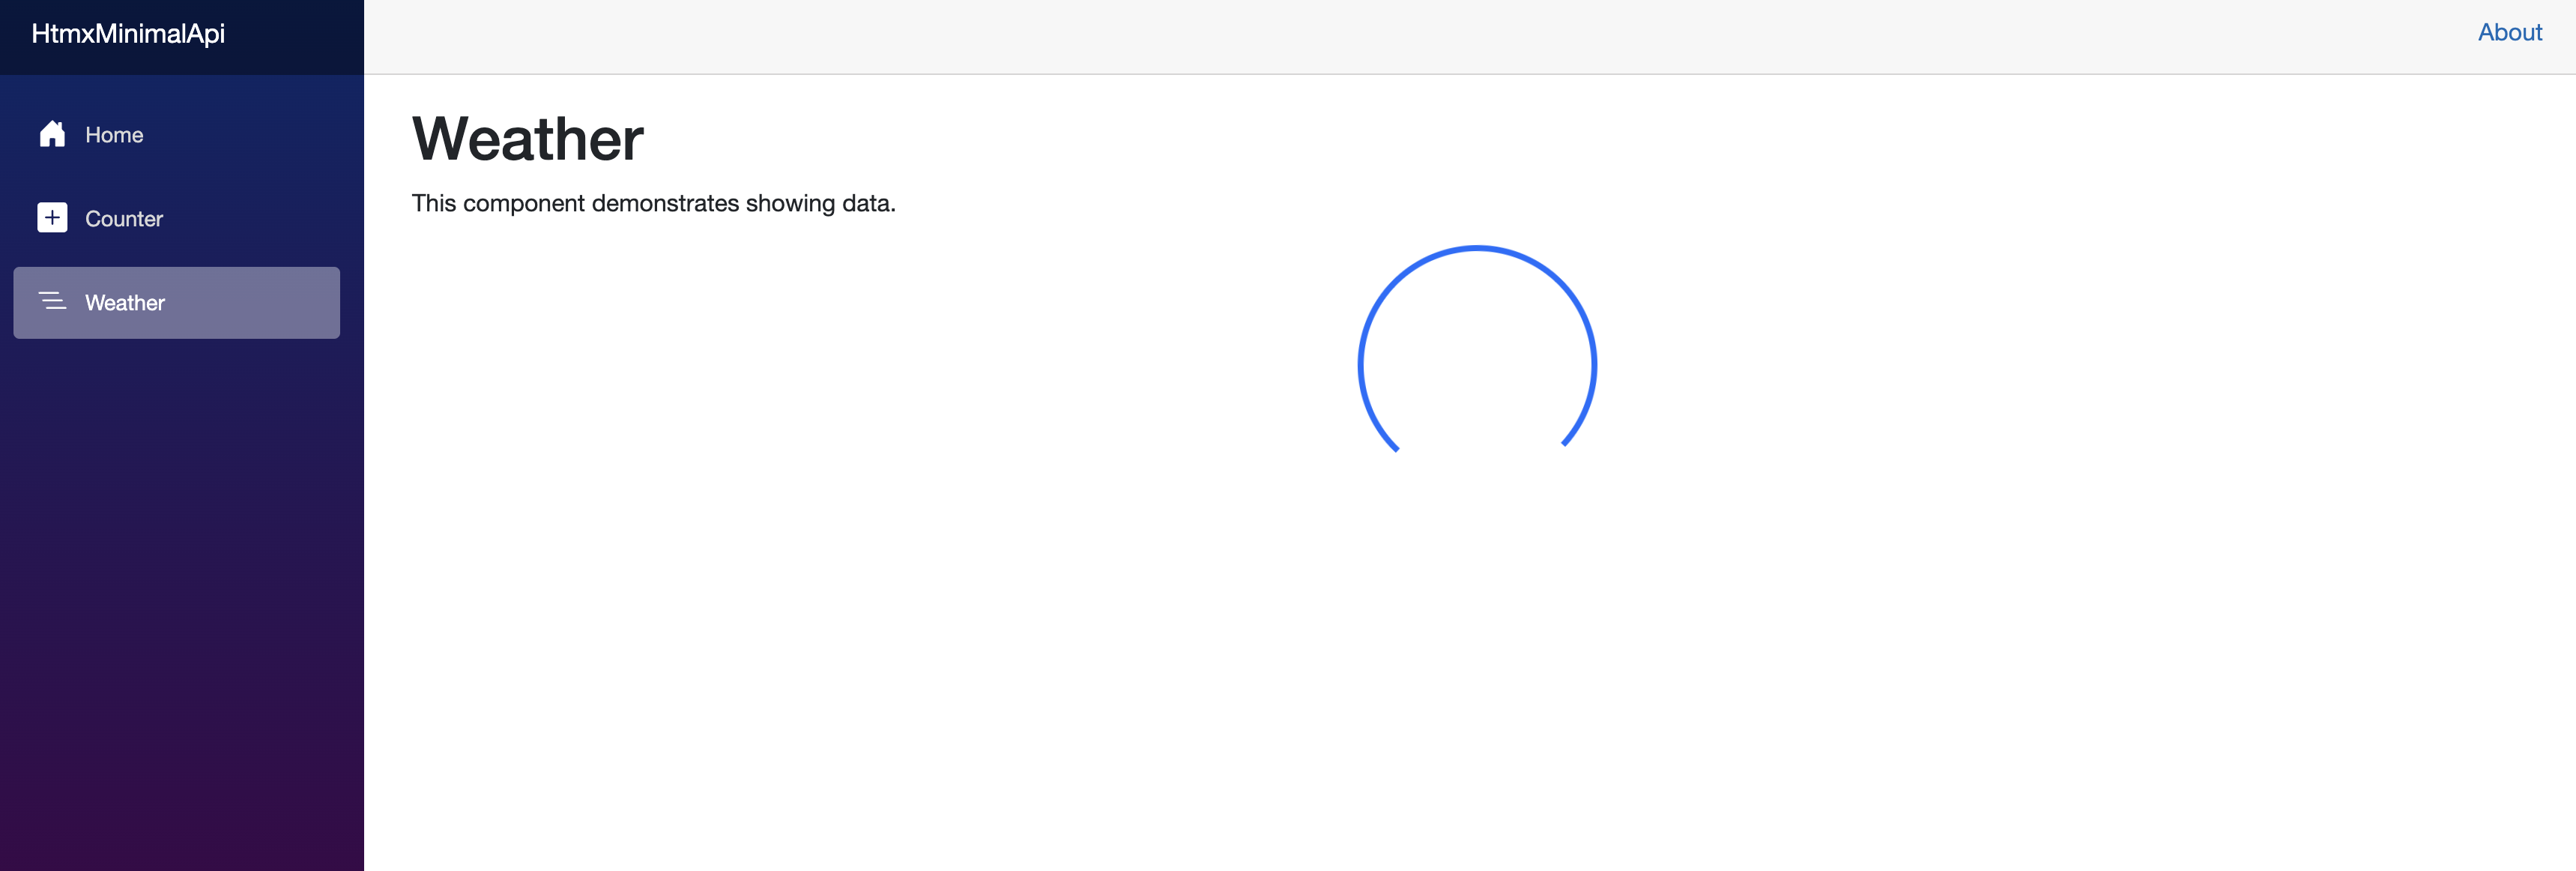
Loading the weather.
Looks great! When five seconds are up, the empty table shows.
Real Data + Paging
Note
Want to just see the code? Click here!
First, I have made some generic paging classes that we will implement. Our weather request will implement PagedRequest and our weather response will implement PagedResponse<T>.
The idea is that these can be used for any type of tabular data, however, not just for the weather.
// Features/Shared/Paging.cs
public abstract class PagedRequest
{
    private int _page = 1;

    public int Page
    {
        get => _page;
        set => _page = value <= 0 ? 1 : value;
    }

    public virtual int Size { get; set; } = 10;
    public int Skip => (Page - 1) * Size;

    protected static ValueTask<T> BindInternalAsync<T>(HttpContext context)
        where T : PagedRequest
    {
        var result = Activator.CreateInstance<T>();

        _ = int.TryParse(context.Request.Query[nameof(Page)], out var page);
        result.Page = page;

        _ = int.TryParse(context.Request.Query[nameof(Size)], out var size);
        result.Size = size;

        return ValueTask.FromResult(result);
    }
}

public abstract class PagedResponse<T> where T : class
{
    public required int Page { get; init; }
    public required int Size { get; init; }
    public required int TotalCount { get; init; }
    public required ICollection<T> Items { get; init; } = [];

    public int TotalPages => (int)Math.Ceiling((decimal)TotalCount / Size);
    public bool HasMorePages => Page < TotalPages;
}
Now, we are going to make a generic component that handles the paging using these abstract classes. We are going to use basic submit buttons that then trigger the form.
<!-- Features/Shared/Paging.razor -->
@typeparam T where T : class
<div class="btn-group w-100 paging">
<button class="btn btn-outline-primary @PreviousCssClass" value="@(Response?.Page - 1)" name="@Name" type="submit">
<span>« Previous</span>
</button>
<div class="btn btn-secondary pe-none">
<span>Page @Response?.Page</span>
</div>
<button class="btn btn-outline-primary @NextCssClass" value="@(Response?.Page + 1)" name="@Name" type="submit">
<span>Next »</span>
</button>
</div>
<input type="hidden" name="@Name" value="@(Request?.Page ?? 1)" />
@code {
[Parameter, EditorRequired] public PagedResponse<T>? Response { get; set; }
[Parameter, EditorRequired] public PagedRequest? Request { get; set; }
private string Name => nameof(PagedRequest.Page);
private bool IsNextEnabled => Response?.HasMorePages is true;
private bool IsPreviousEnabled => Response?.Page is not null && Response.Page != 1;
private string PreviousCssClass => IsPreviousEnabled ? "" : "disabled";
private string NextCssClass => IsNextEnabled ? "" : "disabled";
}
Next, I am going to modify the overall weather forecast page to accept another hx-trigger type - submit. Also, I have added hx-push-url="true" so that the paging parameters are sent to the browser search bar for easy direct navigation.
Finally, I have added the <WeatherList> component underneath the form.
<!-- Features/Weather.razor -->
<form hx-get="/weather" hx-trigger="load, submit" hx-push-url="true">
    <WeatherList />
</form>
The reason I added the WeatherList component directly is because I moved the Loading spinner underneath it. The loading spinner will show whenever the page is loading (when going back and forward pages
for example), not just the first time like before.
<!-- Features/WeatherList.razor -->
<Loading />

<table class="table">
    <thead>
    <tr>
        <th>Date</th>
        <th>Temp. (C)</th>
        <th>Temp. (F)</th>
        <th>Summary</th>
    </tr>
    </thead>
    <tbody>
    @if (Response is not null)
    {
        @foreach (var forecast in Response?.Items ?? [])
        {
            <tr>
                <td>@forecast.Date.ToShortDateString()</td>
                <td>@forecast.TemperatureC</td>
                <td>@forecast.TemperatureF</td>
                <td>@forecast.Summary</td>
            </tr>
        }
    }
    </tbody>
</table>

<div class="row d-flex justify-content-end">
    <div class="col-lg-auto">
        <Paging Request="Request" Response="Response"></Paging>
    </div>
</div>

@code {
    [Parameter] public WeatherForecastRequest Request { get; set; } = new();
    [Parameter] public WeatherForecastResponse? Response { get; set; }

    public class WeatherForecast
    {
        public DateOnly Date { get; init; }
        public int TemperatureC { get; init; }
        public string? Summary { get; init; }
        public int TemperatureF => 32 + (int)(TemperatureC / 0.5556);
    }

    public class WeatherForecastRequest : PagedRequest
    {
        // View more at https://learn.microsoft.com/en-us/aspnet/core/fundamentals/minimal-apis/parameter-binding?view=aspnetcore-9.0#bindasync
        public static async ValueTask<WeatherForecastRequest> BindAsync(HttpContext context)
        {
            var request = await BindInternalAsync<WeatherForecastRequest>(context);
            // Other properties can be added here like filters.

            return request;
        }
    }

    public class WeatherForecastResponse : PagedResponse<WeatherForecast>
    {
        // Other data can be send back.
    }
}
Finally, we need to update our minimal API endpoint to accept WeatherForecastRequest and to skip and take depending on what the passed page number is. We will return a
WeatherForecastResponse with the page number, total count, and size of the query. Size is not an option for the user to pick but totally could be!
// Program.cs
// Code omitted for brevity..
app.MapGet("/weather", Results<RazorComponentResult<Weather>, RazorComponentResult<WeatherList>>(WeatherList.WeatherForecastRequest query, HttpContext httpContext) =>
{
    var isHtmxRequest = httpContext.Request.Headers.ContainsKey("HX-Request");
    var isBoosted = httpContext.Request.Headers.ContainsKey("HX-Boosted");
    if (!isHtmxRequest || isBoosted) // If a user directly navigates to the page (non-HTMX) OR the anchor link is clicked on the navbar.
    {
        return new RazorComponentResult<Weather>();
    }

    var startDate = DateOnly.FromDateTime(DateTime.Now);
    var summaries = new[] { "Freezing", "Bracing", "Chilly", "Cool", "Mild", "Warm", "Balmy", "Hot", "Sweltering", "Scorching" };
    var forecasts = Enumerable.Range(1, 100).Select(index => new WeatherList.WeatherForecast
    {
        Date = startDate.AddDays(index),
        TemperatureC = Random.Shared.Next(-20, 55),
        Summary = summaries[Random.Shared.Next(summaries.Length)]
    }).ToArray();

    var pagedForecasts = forecasts
        .Skip(query.Skip)
        .Take(query.Size)
        .ToArray();

    var response = new WeatherList.WeatherForecastResponse
    {
        Items = pagedForecasts,
        Page = query.Page,
        Size = query.Size,
        TotalCount = forecasts.Length
    };

    return new RazorComponentResult<WeatherList>(new { response });
});
Success! Here is what the entire page looks like.
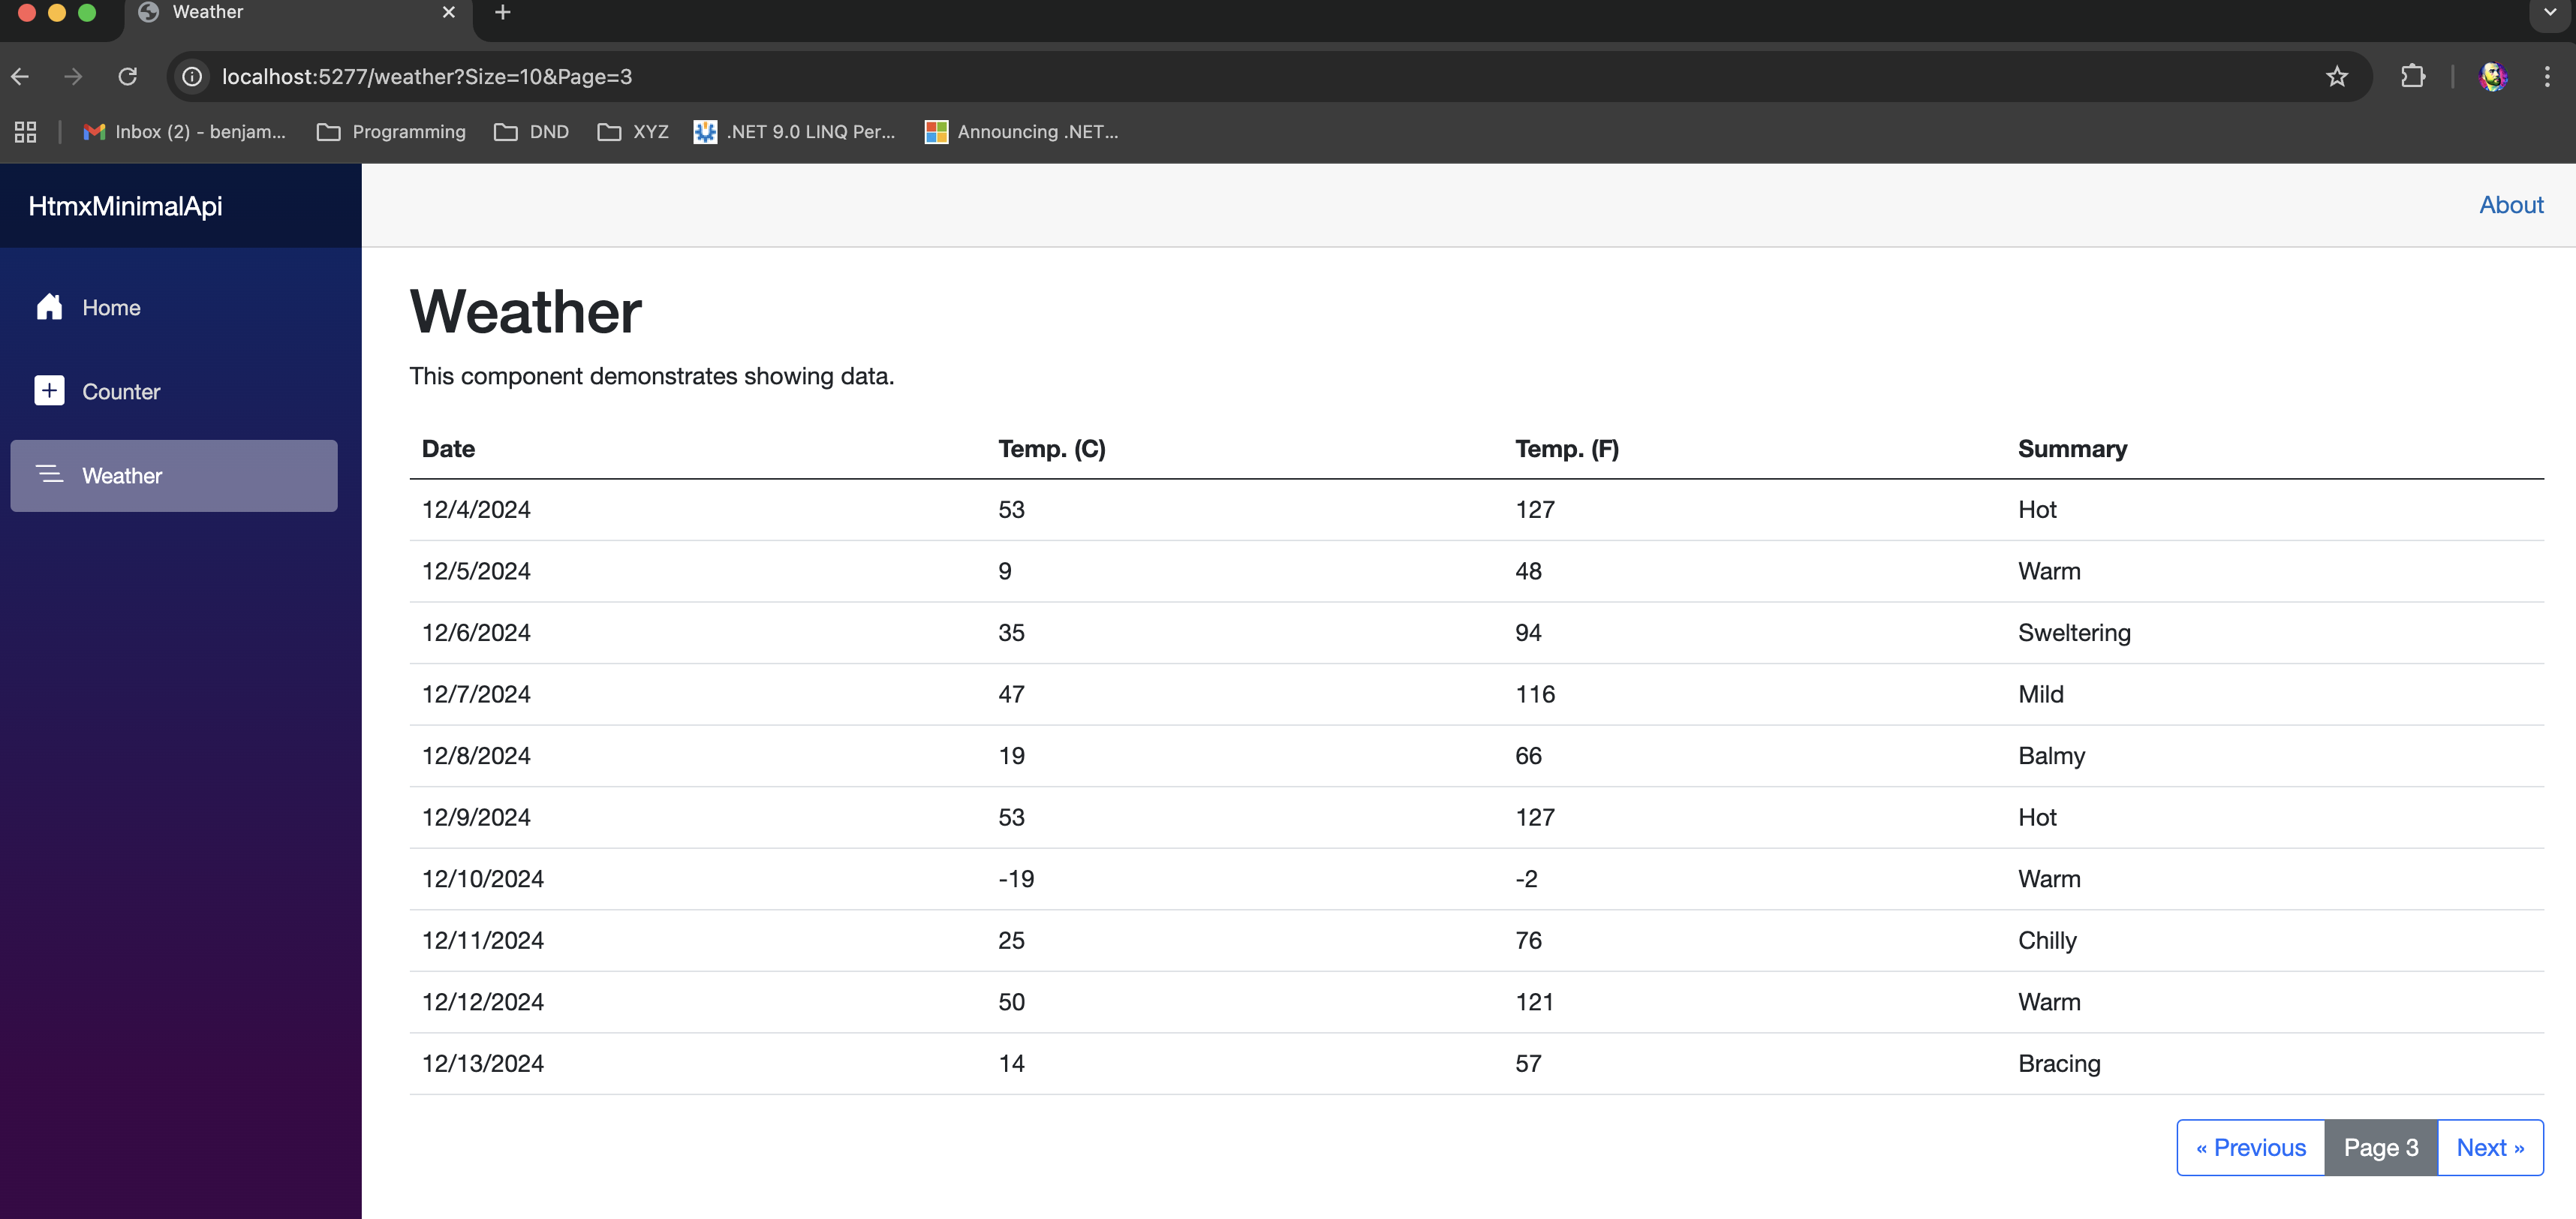
The table with paging.
Handling HTMX Errors & Other Status Codes
Status code pages can leverage the existing ASP.NET Core middleware about 99% of the way there. Just as a refresher lets add what we need to our Program.cs file. A new endpoint that takes in a status code
as well as the middleware the .NET team has already made for us.
// Program.cs
// Code omitted for brevity.
if (app.Environment.IsProduction()) // This is usually the other way but to demonstrate the functionality I swapped it.
{
    app.UseDeveloperExceptionPage();
}
else
{
    app.UseStatusCodePagesWithRedirects("/StatusCode/{0}");
    app.UseExceptionHandler("/StatusCode/500", true);
    app.UseHsts();
}

// https://learn.microsoft.com/en-us/aspnet/core/web-api/handle-errors?view=aspnetcore-9.0#exception-handler
// Do not mark the error handler action method with HTTP method attributes. Explicit verbs prevent some requests from reaching the action method.
app.Map("/statuscode/{code:int}", (int code)
    => new RazorComponentResult<StatusCode>(new { code }));
Here is the StatusCode.razor page. Nothing special happening in here.
@layout HtmxLayout

<Title>
    @Code
</Title>

<div class="d-flex align-items-center justify-content-center h-100">
    <div class="text-center">
        <h1 class="display-1 fw-bold text-primary"><i class="fa-solid fa-truck-ramp-box"></i> We're Sorry.</h1>
        <p class="lead">
            @Message
        </p>
        <a href="/" class="btn btn-primary">Go Home</a>
    </div>
</div>

@code
{
    [Parameter] public int Code { get; set; }

    private string Message => Code switch
    {
        400 => "The request that was sent was not in the right format. Please retry it or try again later.",
        401 => "You cannot access this page. Please log in and then try again.",
        403 => "You do not have permission to access this page.",
        404 => "The page you are looking for was not found.",
        _ => "Something went wrong. Please try this page again later."
    };
}
The only thing we need to add is the ability to redirect to this page when something goes wrong via an HTMX request. When an exception occurs at this point of the code, the user experience is confusing - nothing happens at all (except in the console).
All we need to do is add a little bit of middleware to HTMX via a javascript file that runs when the window first loads. If HTMX receives a response back where the status code is greater than or equal to 400, redirect to our status code page.
// wwwroot/client-error-handling.js
window.addEventListener("load", () => {
    htmx.on("htmx:responseError", (event) => {
        if (event.detail.xhr.status >= 400) {
            window.location = window.location.origin + "/statuscode/" + event.detail.xhr.status;
        }
    });
});
Of course, this script needs added to the HtmxLayout.razor file. Easy as that, works great as you can see from the picture below.

An expected 404 page.
Advanced Topics
Using ‘MapStaticAssets’ in .NET 9
Tip
There is a workaround now which involves rigging up your own static asset mapper in lieu of an official solution. You can view it here. Thanks maartenvansambeek!
Being able to use .MapStaticAssets for its build-time compression, e-tagging, and cache busting features is a no-brainer over the traditional .UseStaticFiles. The only problem is that .MapStaticAssets has some internals that actually plays off of MapRazorComponents<T>, which you would think you wouldn’t need in a minimal api + htmx context. That is not the case.
There is currently no known workaround for this but I’ve opened a issue on the dotnet repository on GitHub.
Fortunately, .MapStaticAssets working features includes what .UseStaticFiles used to do, as well as the e-tag feature. So a least it is better than it was in .NET 8, I guess. Stay tuned.
The Browser “Back” Button
The browser back button can be a problem no matter if you’re using Blazor Web, React, or HTMX. With HTMX we can configure what to do if there is a cache miss on history, which is what every browser pulls from in order to quickly send a page back. Because interacting through websites is forward and includes things like HX-Request and HX-Boosted headers, when we use the Back button a request will occasionally include those headers too and the user will see just a component rendered - missing the page around it. You can read more about this here.
We can avoid this by configuring HTMX to refresh the full page instead via two things. By configuring HTMX itself and then including hx-history on the body attribute. Note that this may not be preferable for you in some situations. You can read more about hx-history here.
<!-- Features/Shared/HtmxLayout.razor -->
<meta name="htmx-config" content='{"refreshOnHistoryMiss":"true"}'/>

<body hx-boost="true" hx-history="false">
</body>
Preserving State
A few potential good candidates for preserving state:
- Dynamic items in the navbar where they should only change state through HTMX event triggers.
- Content that contains videos where someone has played it so as to not lose the position.
- Things that open or close, like accordions, where you want to swap the accordion parent content but maintain an accordion’s item being open.
You can preserve state by attaching hx-preserve on the element which will automatically preserve any child elements too. Read more about preserving state here.
Blazor MAUI With Htmx
There isn’t much to say in this section besides that Blazor Hybrid using MAUI’s BlazorWebView works with HTMX - it is all just HTML, CSS, and a little bit of javascript.
There are some really cheap ways to even bring along an existing web app into a native app by simply pointing your BlazorWebView to your existing web app without even sharing the components. Admittedly, I have not submitted this shell app to the respective iOS and Android app stores.
Warning
Apple has language protecting their App Store against barebone apps like the one stated above.
Your mileage may vary but you can increase your chances by clearly stating the value proposition of doing so and not going into the internals of the implementation.
Automatically Adding Endpoints
Since all of our HTML is going to flow through endpoints we are going to have a lot of endpoints and that can be easy to forget to add every endpoint every time. When considering things like authorization groups and all the other middleware or filters you might need, its easier to colocate the razor and the endpoints themselves. We can create an interface and do some assembly scanning in order to automatically register everything.
// Features/Shared/RouteExtensions.cs
public static class RouteExtensions
{
    public static IEndpointRouteBuilder MapApplicationRoutes(this IEndpointRouteBuilder routeBuilder)
    {
        var routeDefinitions = typeof(Program).Assembly
            .GetTypes()
            .Where(t => t.IsAssignableTo(typeof(IRouteDefinition))
                        && t is { IsAbstract: false, IsInterface: false })
            .Select(Activator.CreateInstance)
            .Cast<IRouteDefinition>();

        foreach (var routeDefinition in routeDefinitions) routeDefinition.MapRoutes(routeBuilder);

        return routeBuilder;
    }
}

public interface IRouteDefinition
{
    IEndpointRouteBuilder MapRoutes(IEndpointRouteBuilder routes);
}
This can be implemented directly on on component pages or in the code behind file.
// Features/EndpointRouting.razor.cs
public partial class EndpointRouting : IRouteDefinition
{
    public IEndpointRouteBuilder MapRoutes(IEndpointRouteBuilder routes)
    {
        routes.MapGet("/endpointrouting", () => new RazorComponentResult<EndpointRouting>());

        return routes;
    }
}
Finally, we just need to invoke this in our Program.cs file
// Program.cs
// Code omitted for brevity.
app.MapApplicationRoutes();
I strongly prefer this approach as it pairs very nicely with vertical slicing and locality of behavior.
Disabling Buttons On Submit
When we click a form submit we want to make sure the server has enough time to process the request. Often times, users will click buttons multiple times either by accident or through impatience. We can prevent this by using an HTMX extension called loading-states. You can read the documentation how to do this here.
Tip
HTMX has many extensions which solve all sorts of different problems. Importantly, they are opt-in. You can view the entire list here.
Client-side Interactivity (Hyperscript)
Hyperscript is another tool, written by the same folks who wrote HTMX, to help developers write interactive HTML. The difference is that hyperscript is purely client side but it is super rich with features like events (queuing, filtering, etc.), async, etc.. You can even invoke javascript within it. The advantages of hyperscript over javascript for me are two-fold:
- Keep behavior as close to what is using it as possible (locality of behavior).
- Remove loading & caching of scripts entirely - we only load the behavior (via hyperscript on the elements) when it is needed.
As an example, lets borrow the previous section’s problem. Instead of using the htmx extension, lets use hyperscript to disable the button ourselves. This might look something like:
<button class="btn btn-primary" _="
            on click queue none
                add @disabled to me
                remove .d-none from #loading
                wait 5s
            finally
                remove @disabled from me
                add .d-none to #loading">
    <div class="spinner-border spinner-border-sm d-none" id="loading"></div>
    Save
</button>
Let’s break this down
on click queue noneWhen the button is clicked, don’t respond to any other click events until the entire chain is complete.add @disabled to meAdd the attributedisabledto the calling elementbutton.remove .d-none from #loadingRemove the class.d-nonefrom an element with the identifier ofloading.wait 5swait for 5 seconds.finallyregardless of the result of the preceedingon clickevent, run this.remove @disabled from meRemove the attributedisabledfrom the calling elementbutton.add .d-none to #loadingAdd the class.d-noneto the element with the identifier ofloading.
Testing
You can test blazor components using bUnit and the minimal api can be tested using WebApplicationFactory.
Alternative / Assistive Libraries
If some of this seems overwhelming or too much work - that’s okay. There are some great community NuGet packages which using HTMX under the hood but have abstracted away some of the complexity. Some of those packages are below:
- Rizzy - A fully-fleged framework for using HTMX in .NET. Uses Alpine.js for some client-side interactivity.
- HTMX.Net - Use HTMX with Razor pages (not Minimal APIs). Also brings in some helpers for triggers that may be useful even when not using Razor pages.
- Surreal - An alternative to Hyperscript that brings in locality-of-behavior.
Wrap Up
I hope this was helpful. I had broad ambitions for this post and it grew quickly in what I thought was important. I just can’t simply cover every single use-case you might have but hopefully this is enough to get you thinking with (and consider using) HTMX.
Please leave any comments below - especially better ways of doing something - or by engaging with me on social media. Thanks for reading!